Category Archives: Uncategorized

Meatspace abstractions

Abstractions are not just for programming. Abstractions are used in “real life” too.

The concept of a “gear” in an automobile transmission is a good example. What we call first gear, second gear, etc. are actually configurations of multiple gears which result in spinning the driveshaft at different speeds. You might call each gear a “driveshaft gear configuration”. But “driveshaft gear configuration” is too much of a mouthful, so we just call it a “gear”.

Most people don’t know how an automobile transmission works. I myself had to watch a YouTube video about transmissions in order to write this post. Thankfully, we don’t have to know how a transmission works in order to drive a car. In the case of a manual transmission, we only have to learn how to operate the clutch and the stick. With an automatic transmission, we don’t even have to do that. The car abstracts away that detail for us.

My point is that there’s no single entity in physical reality called a “gear”. Abstraction is when we replace lower-level ideas with higher-level ideas in order to more easily understand a certain part of the world. In this case we replace the lower-level idea—a configuration of gears—with a higher-level idea which we call a “gear”.

Abstraction can even be applied to natural phenomena. When rain falls heavily from the sky, accompanied by wind and lightning, we call it a storm. Assigning this group of phenomena to a single idea is abstraction because it replaces lower-level ideas with higher-level ones. Abstraction must have been used even by cavemen.

Why am I talking about non-programming abstractions? How does this help us in programming?

By going outside of programming and considering what abstraction is in general, we can get a clearer idea of what abstraction means, why abstraction is useful and when we might want to use it.

To quote Edsger W. Dijkstra, “The purpose of abstracting is not to be vague, but to create a new semantic level in which one can be absolutely precise.” When we talk about first gear, second gear, etc. in a car, we’re not being the least bit vague. The language we’re using is neither too specific nor too general. For a mechanic working on a transmission, it would probably make sense to speak in terms of lower-level details, like actual individual physical gears, but for a driver of a car, the abstraction of “gear” is at a higher level and precisely the right level for its purpose.

Most web applications, unfortunately, leave most of the benefits of abstraction on the table. They expose the finest details of the system’s behavior and leave it to the reader to piece together the higher-level meaning. It doesn’t have to be this way though. By using a bit of imagination, you can replace lower-level ideas with higher-level ideas in order to make your system easier to understand.

Abstraction isn’t just a technical idea to be used once in a while. It should be in our minds at all times. Abstraction is, and has been since ancient times, one of the fundamental tools that humans use to make sense of our world. We programmers should take full advantage of it.

Testing anti-pattern: accessing private properties

The point of private properties on an object, like private methods and private instance variables, is so you know what you can safely refactor without having to worry that you’re going to mess up some external client that uses that object.

Ruby provides “sharp knives” that let you get around privateness if you want to. You can use Object#send, instance_variable_set or instance_variable_get to access private properties without invoking errors.

Sometimes tests access private properties. This comes at a cost. When tests involve private properties, the private areas of the object can’t be refactored without also modifying the test.

This tight coupling of the tests to the implementation will make it riskier and more annoying to perform refactoring, which means you’ll probably do less of it, which means the design of your code will probably be worse as a consequence.

Instead of testing private properties directly, it’s better to test the behavior of an object’s private properties indirectly through the object’s public API. That way your tests will be more loosely coupled with your application code and you can enjoy more of the refactoring benefits that testing is supposed to provide.

Why the text on my site isn’t full-width or centered

I’m often asked why the text in my site isn’t full-width or centered.

The reason the text isn’t full-width is because I believe that the wider a block of text is, the harder it is to follow the end of one line of text to the beginning of the next one.

The reason my text column isn’t centered is because I don’t think it would look very good.

How I approach software estimation

Software estimation is really hard. I’ve never encountered a programmer who’s good at it. I don’t think such a programmer exists. I myself am not good at estimation nor do I expect ever to be.

Here are two tactics that I use to deal with the challenge of estimation.

  1. Try to make estimation as irrelevant as possible
  2. Try to use historical data to make future estimates

Try to make estimation as irrelevant as possible

I figure if I’ll never be able to estimate accurately, at least I can try to make estimates a less important part of the picture. Probably my most successful tactic in this area is to try to only take on projects that last a matter of days. If a project will take more than a matter of days, then I try to break that project up and identify a sub-project that will only take a matter of days. That way, if I estimate that the project will take 2 days and it really takes 4, no one has “lost” very much and nobody’s too upset (especially if I let my stakeholder know that I have very low confidence in my estimate).

Try to use historical data to make future estimates

Obviously all estimates are based to an extent on historical data because you’re basing your estimates on past programming experiences, but there’s a little more to it than that. When I work on a project, I break the work into individual features. I have a sense for how long a feature will take on average. Even though some features take an hour and some features take three days, a feature takes some certain amount of time on average. If I think the average amount of time I take to build a feature is half a day and my I can see that my small project has 5 features, then I can estimate that my project will take 5 * 0.5 = 2.5 days. Obviously there’s a lot of room for inaccuracy in this methodology, hence tactic #1.

If you really want to go deep on estimation, I recommend Software Estimation: Demystifying the Black Art by Steve McConnell.

I’m renaming Rails with Jason to Code with Jason

I’ve decided to rename my podcast, formerly known as Rails with Jason, to Code with Jason.

Such a pivotal event in world history of course calls for some commentary. Here’s what you can expect to be different on the show, what you can expect to stay the same, and why I’ve decided to make this change.

What will change

As the name change implies, the scope of the podcast will no longer be limited to just Rails. This is actually less of a change of direction and more of an acknowledgement of existing reality. It’s already the case that probably half or more of my content is not Rails-specific.

One consequence of this change that I’m excited about is that I’ll be able to dramatically broaden the palette of guests that I can have on the show. When the podcast was explicitly Rails-focused, I had reservations about inviting “big names” from outside the Rails world on the show because I didn’t imagine that being on a Rails podcast would necessarily fit into their plans. Now that that limit is gone, I’ll be much more comfortable inviting any guest at all.

What will stay the same

The format of the show will still be the exact same. I’ll still have guests on for (hopefully) interesting technical conversations.

I’m still going to talk about Ruby on Rails. I myself am still a Rails developer and I expect to remain so indefinitely. If you’re a Rails developer and you’re wondering if the show will still be relevant to you, my hope and expectation is that it will.

Lastly, I’ll of course continue to charm you with my hilarious jokes and dazzle you with my towering intellect. As if I could stop if I wanted to.

Why I’m making this change

My motivation for expanding the scope of my podcast is pretty simple. I want to reach more people and broaden the possibilities for what the show can be. The more programmers I can help and the more I can help them, and the broader the field of topics that can be explored, the more fun and worthwhile of an endeavor this will be for me.

If you’re a listener of the podcast, thanks for listening so far. I hope you’ll join me in this next chapter of the show.

Active Record queries in views: when it’s bad, when it’s fine

“No Active Record queries in views”

Maybe you’ve heard the advice that you shouldn’t put Active Record queries (or other logic) in views, but you’re not sure exactly why, other than “separation of concerns”. Why exactly is separation of concerns good?

The rationale behind this advice is that mixing concerns (like query logic vs. presentation) makes the code harder to understand and change.

Another way to think about this is to think about what kinds of things tend to change together.

Related changes

Even though many changes require touches at multiple levels in order for the change to be complete (model, controller, view)​, some changes are more closely related than others.

A change to the SQL in a query is more likely to call for other SQL changes than it is to call for a CSS change. For this reason, it usually makes sense to put query code next to other query code so that all the query code can be noticed and considered and worked with at the same time.

Sometimes queries in views is fine

Having said that, I don’t dogmatically follow a rule of “no queries in views”. If I for example have a select input and it needs to contain all categories, I’ll unashamedly put Category.all right into my view code. The alternative to this is to clutter up my controller with instance variables and before_actions.

The reason I don’t feel bad about this is that Category.all is unlikely to ever influence or be influenced by some other model change. And in the unlikely event that I’m wrong about that, I can easily move that query out of the view when I need to. But I’m hardly ever wrong about that. (I never put complex queries in my views though.)

Takeaway

Keeping logic code out of views tends to help make your code easier to change and understand. It’s generally good to keep Active Record queries out of views, but putting Active Record queries in views is typically harmless when the query is very unlikely to influence or be influenced by anything else.

Writing software isn’t like building a house, it’s like writing a novel

It’s common to analogize writing software with building a house.

I think it’s a lot more like writing a novel.

With a house, you can add an addition and not necessarily have to change much. But with a novel, everything in it has to reconcile.

The father becomes a mother

Imagine a novel about father who has a troubled relationship with his son because the father spends too much time at the bar, getting in fights and getting fired from a string of jobs due to his irresponsibility. In the end the father dies in a drunken car crash and, fast forward, the son grows up to be just like his father. (Sorry, didn’t mean to make it so dark!)

But then imagine “the requirements change” somehow and the father character needs to be a mother instead.

We can’t just search-and-replace “dad” with “mom”. All sorts of other things need to change as well if the whole thing is going to square up.

If the tragedy of the story is that the son turns out to be just like his father, then maybe a mother-son thing doesn’t really make much sense anymore. Maybe the son has to be a daughter instead. A mother can just as plausibly be an alcoholic as a father of course, but the part about the constant fist fights makes a little less sense now. That part will probably either have to be eliminated or changed to something else.

Every codebase is a novel

Software is of course the same way. Some changes are isolated sometimes, but quite a lot of changes have ripple effects throughout the whole system. And the bigger a codebase gets, the more challenging and time-consuming it is to keep everything self-consistent.

This is why the construction analogy doesn’t really fit all that well. I think the novel analogy is better.

How to install nginx and Passenger on an EC2 instance for Rails hosting

This is part 2 of my series on how to deploy a Ruby on Rails application to AWS. If you found this page via search, I recommend starting from the beginning.

Recap of last step and overview of this step

In the previous step we launched an EC2 instance.

In this step we’re going to install some useful software on our new EC2 instance, specifically web server software.

A note before diving in: I must give credit to Passenger docs, from which some of this is directly lifted.

1. Install nginx

The very first step is to install nginx, which luckily involves very few steps.

As a reminder, these commands and all commands that follow are meant to be run on your new EC2 instance. Instructions for how to SSH into your EC2 instance can be found near the end of the previous step.

sudo apt-get update
sudo apt-get install -y nginx
sudo service nginx restart

2. Install Passenger

I recommend executing each of the following groups of commands separately, one at a time. That way it’s easier to tell whether each group of commands was successful or not.

sudo apt-get install -y dirmngr gnupg
sudo apt-key adv --keyserver hkp://keyserver.ubuntu.com:80 --recv-keys 561F9B9CAC40B2F7
sudo apt-get install -y apt-transport-https ca-certificates

sudo sh -c 'echo deb https://oss-binaries.phusionpassenger.com/apt/passenger bionic main > /etc/apt/sources.list.d/passenger.list'
sudo apt-get update

sudo apt-get install -y libnginx-mod-http-passenger

The following step verifies that the config files do in fact exist at /etc/nginx/conf.d/mod-http-passenger.conf. The result of the ls command is supposed to be the file path, printed back out to you (/etc/nginx/conf.d/mod-http-passenger.conf). If it’s not, there’s a problem.

if [ ! -f /etc/nginx/modules-enabled/50-mod-http-passenger.conf ]; then sudo ln -s /usr/share/nginx/modules-available/mod-http-passenger.load /etc/nginx/modules-enabled/50-mod-http-passenger.conf ; fi
sudo ls /etc/nginx/conf.d/mod-http-passenger.conf

Now we’ll restart nginx to make our changes take effect.

sudo service nginx restart

This step validates the Passenger installation.

sudo /usr/bin/passenger-config validate-install

3. Configure nginx/Passenger to know about Ruby

What follows in this step is roughly copied from this page. If you have trouble or want clarification, I recommend visiting that page to get the info directly from its original source.

The first thing we need to do is find out our Ruby path. Running the following command will tell us. You’ll probably have to look kind of hard because the output of the command is “noisy”. The Ruby path is there but it’s kind of obscured by some other stuff.

passenger-config about ruby-command

Once you’ve found the Ruby path in the output of that command, copy it. We now need to edit /etc/nginx/sites-enabled/default. I use Vim but you can of course use whatever editor you want.

sudo vi /etc/nginx/sites-enabled/default

We’ll need to add the following two lines inside the server block. I don’t believe it matters exactly where these two lines go as long as they’re between the two braces of the server block.


passenger_enabled on;
passenger_ruby /usr/bin/ruby2.5; # Note: your Ruby path may be different

If it helps, here’s what my complete /etc/nginx/sites-enabled/default looks like (with comments removed for brevity):

server {
        listen 80 default_server;
        listen [::]:80 default_server;

        root /var/www/html;

        index index.html index.htm index.nginx-debian.html;

        server_name _;

        # Important: delete the following 3 lines
        # location / {
        #         try_files $uri $uri/ =404;
        # }

        passenger_enabled on;
        passenger_ruby /usr/bin/ruby2.5;
}

Now we’ll restart nginx to make our changes take effect.

sudo service nginx restart

4. Enable port 80 to allow web traffic

Our server is now ready to be visited in the browser, except by default AWS doesn’t have port 80 open, the port for HTTP traffic. Let’s open port 80.

The way we do this is by adding a rule for port 80 to our EC2 instance’s security group.

To do this, first go to to the AWS console, click the EC2 instance, make sure you’re on the Description tab, then click the first link under Security groups.

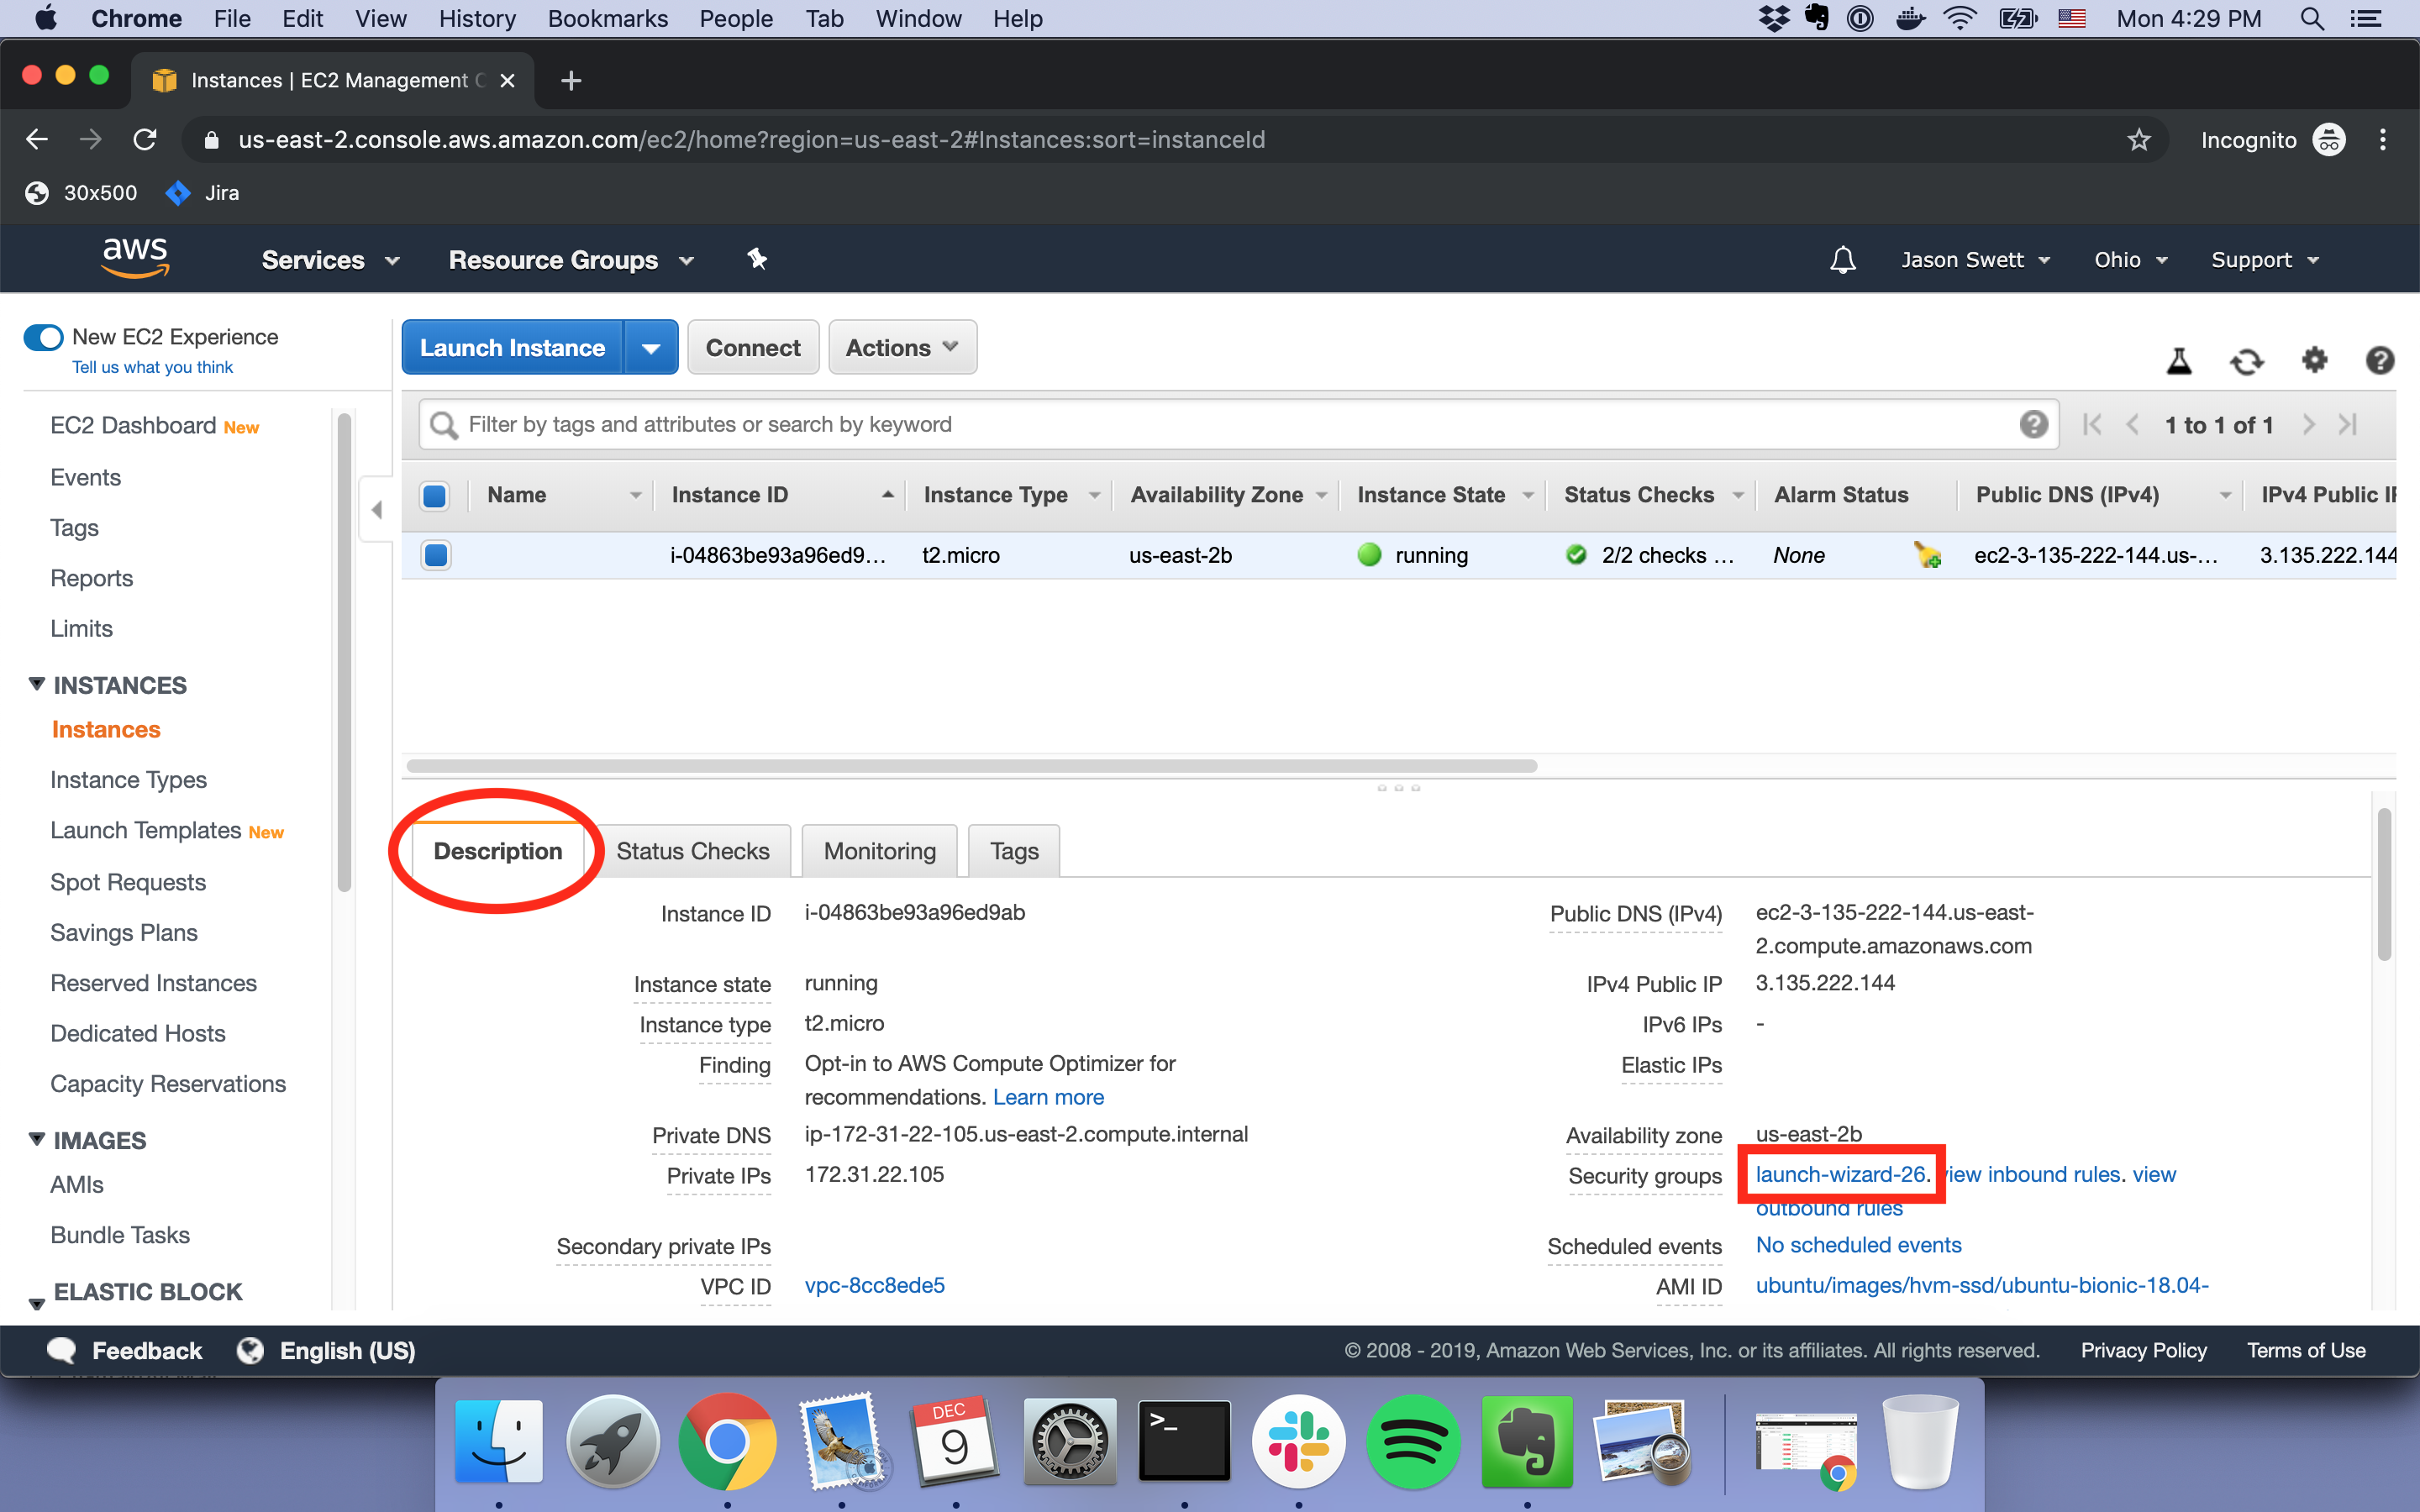
Then, under the Inbound tab, click Edit.

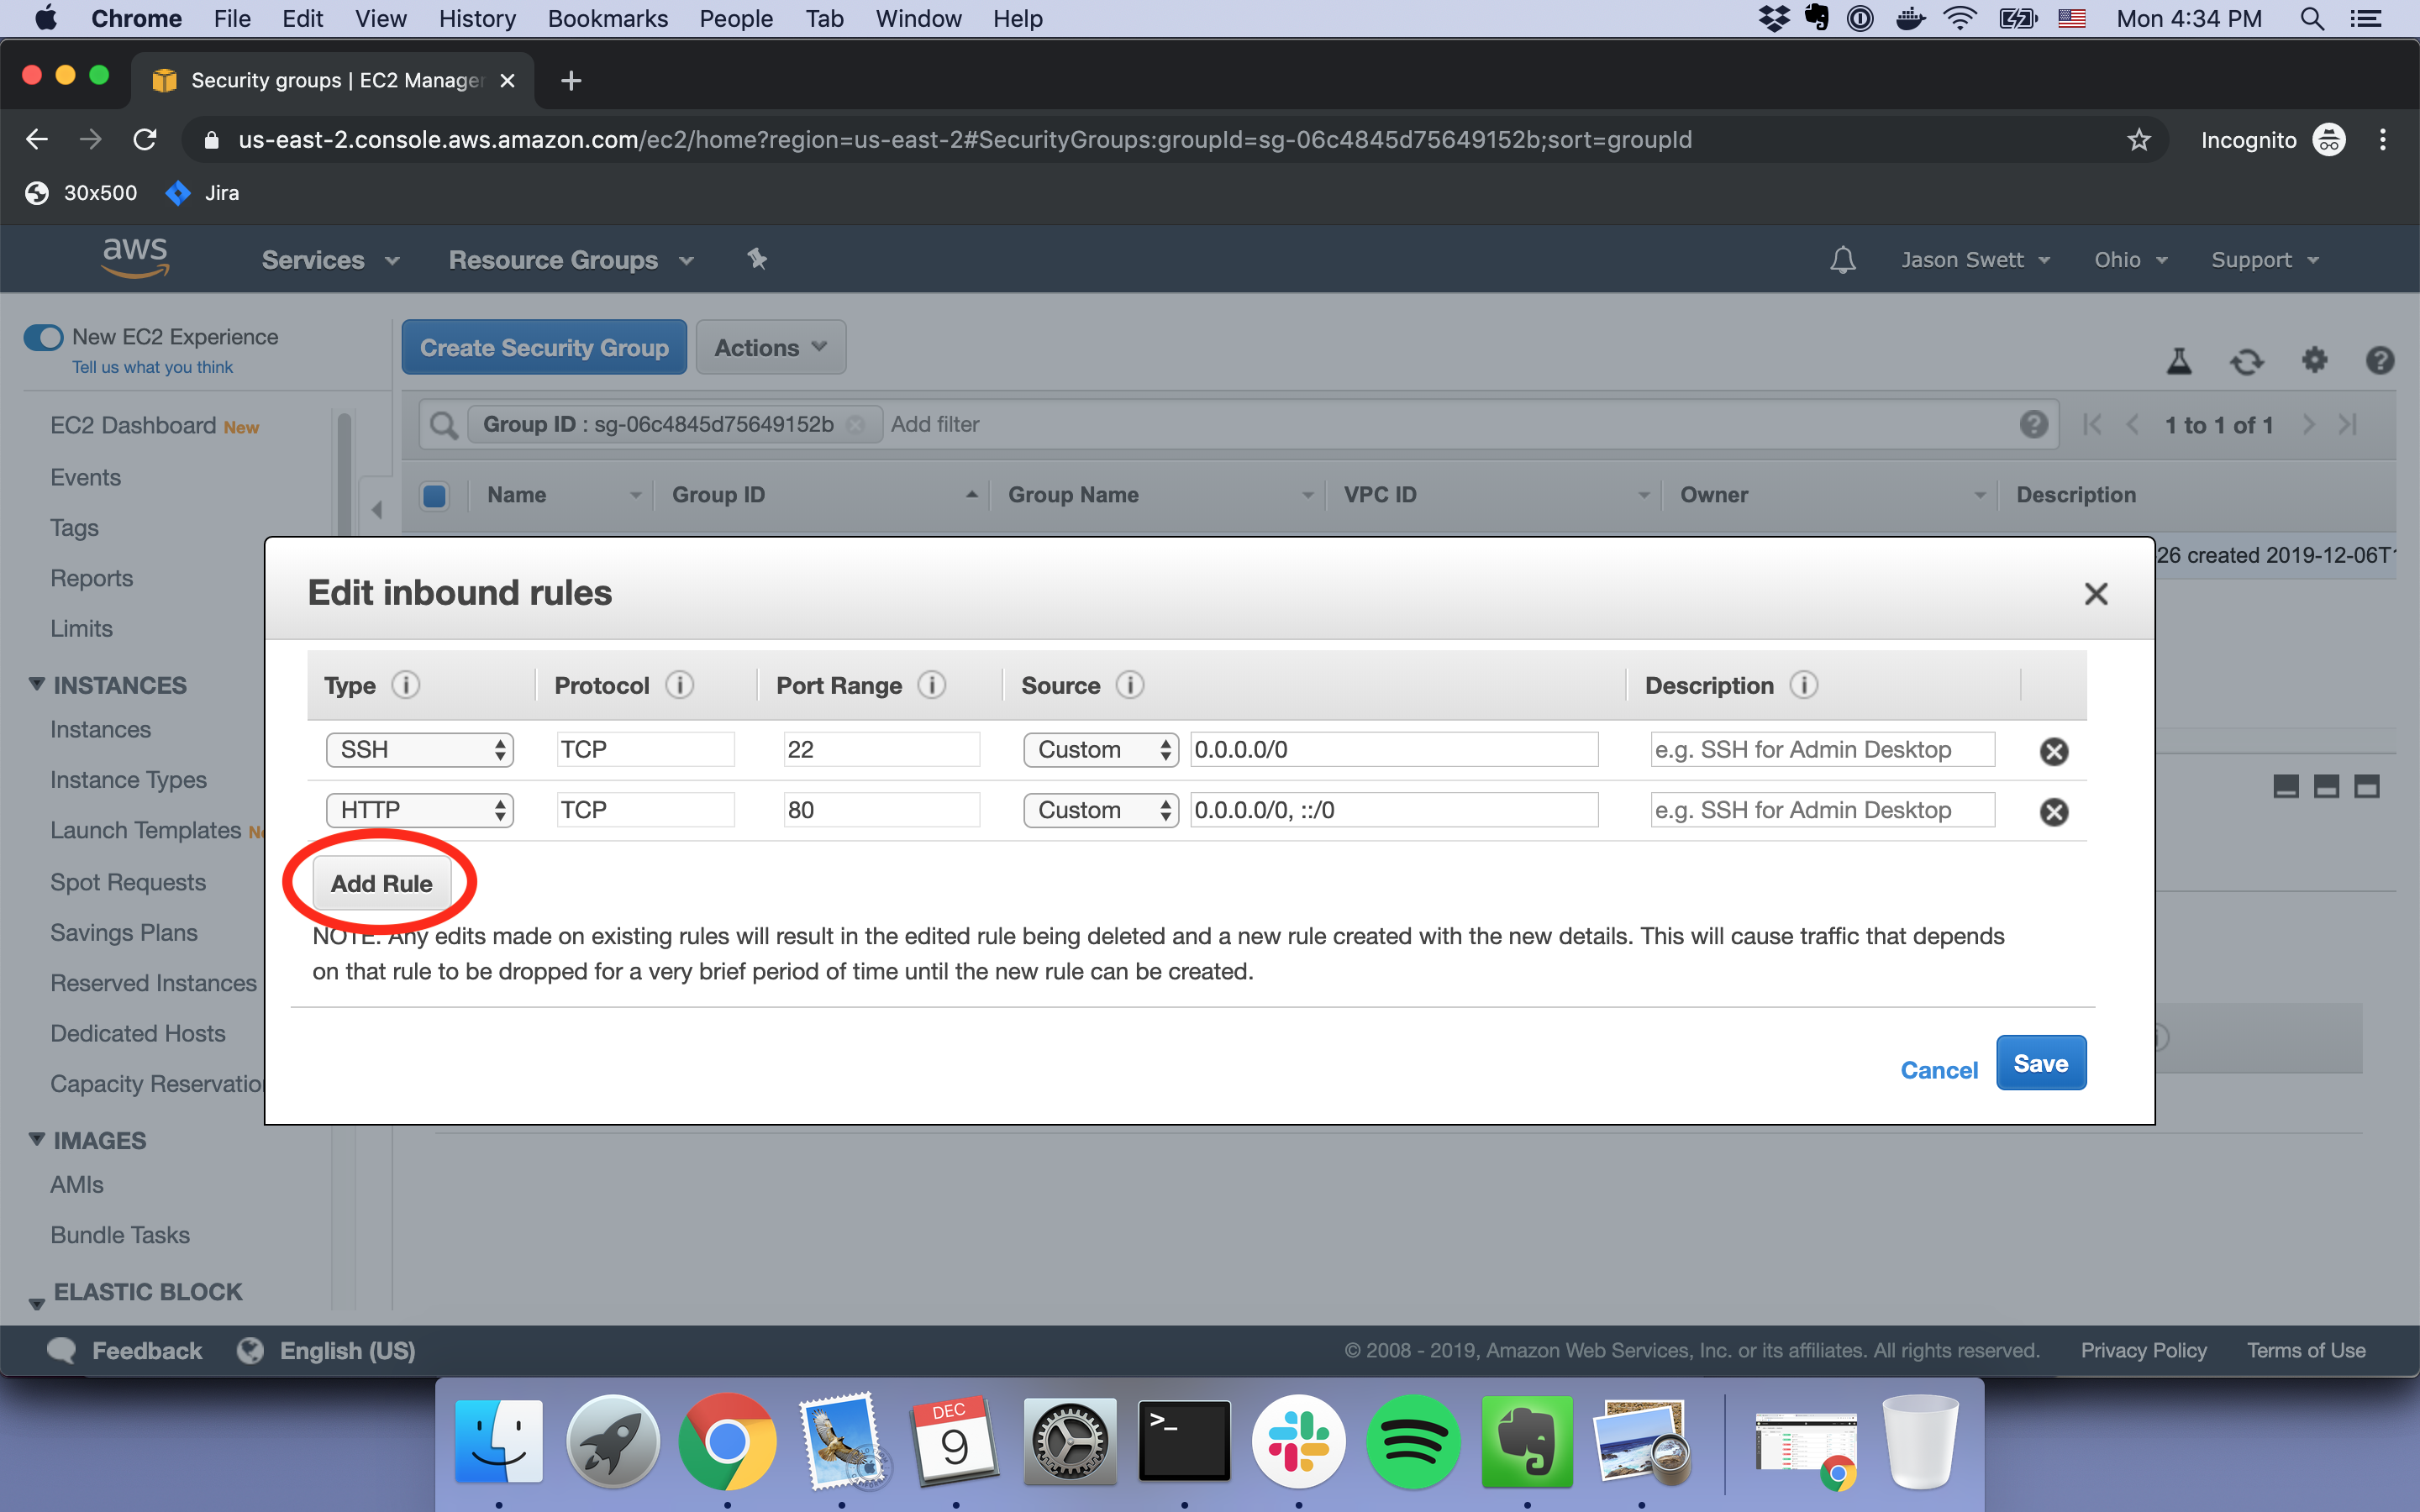
Click Add Rule, select HTTP from the list, then click Save. The change will take effect right away and HTTP traffic will be allowed starting immediately.

5. Visit the server in the browser

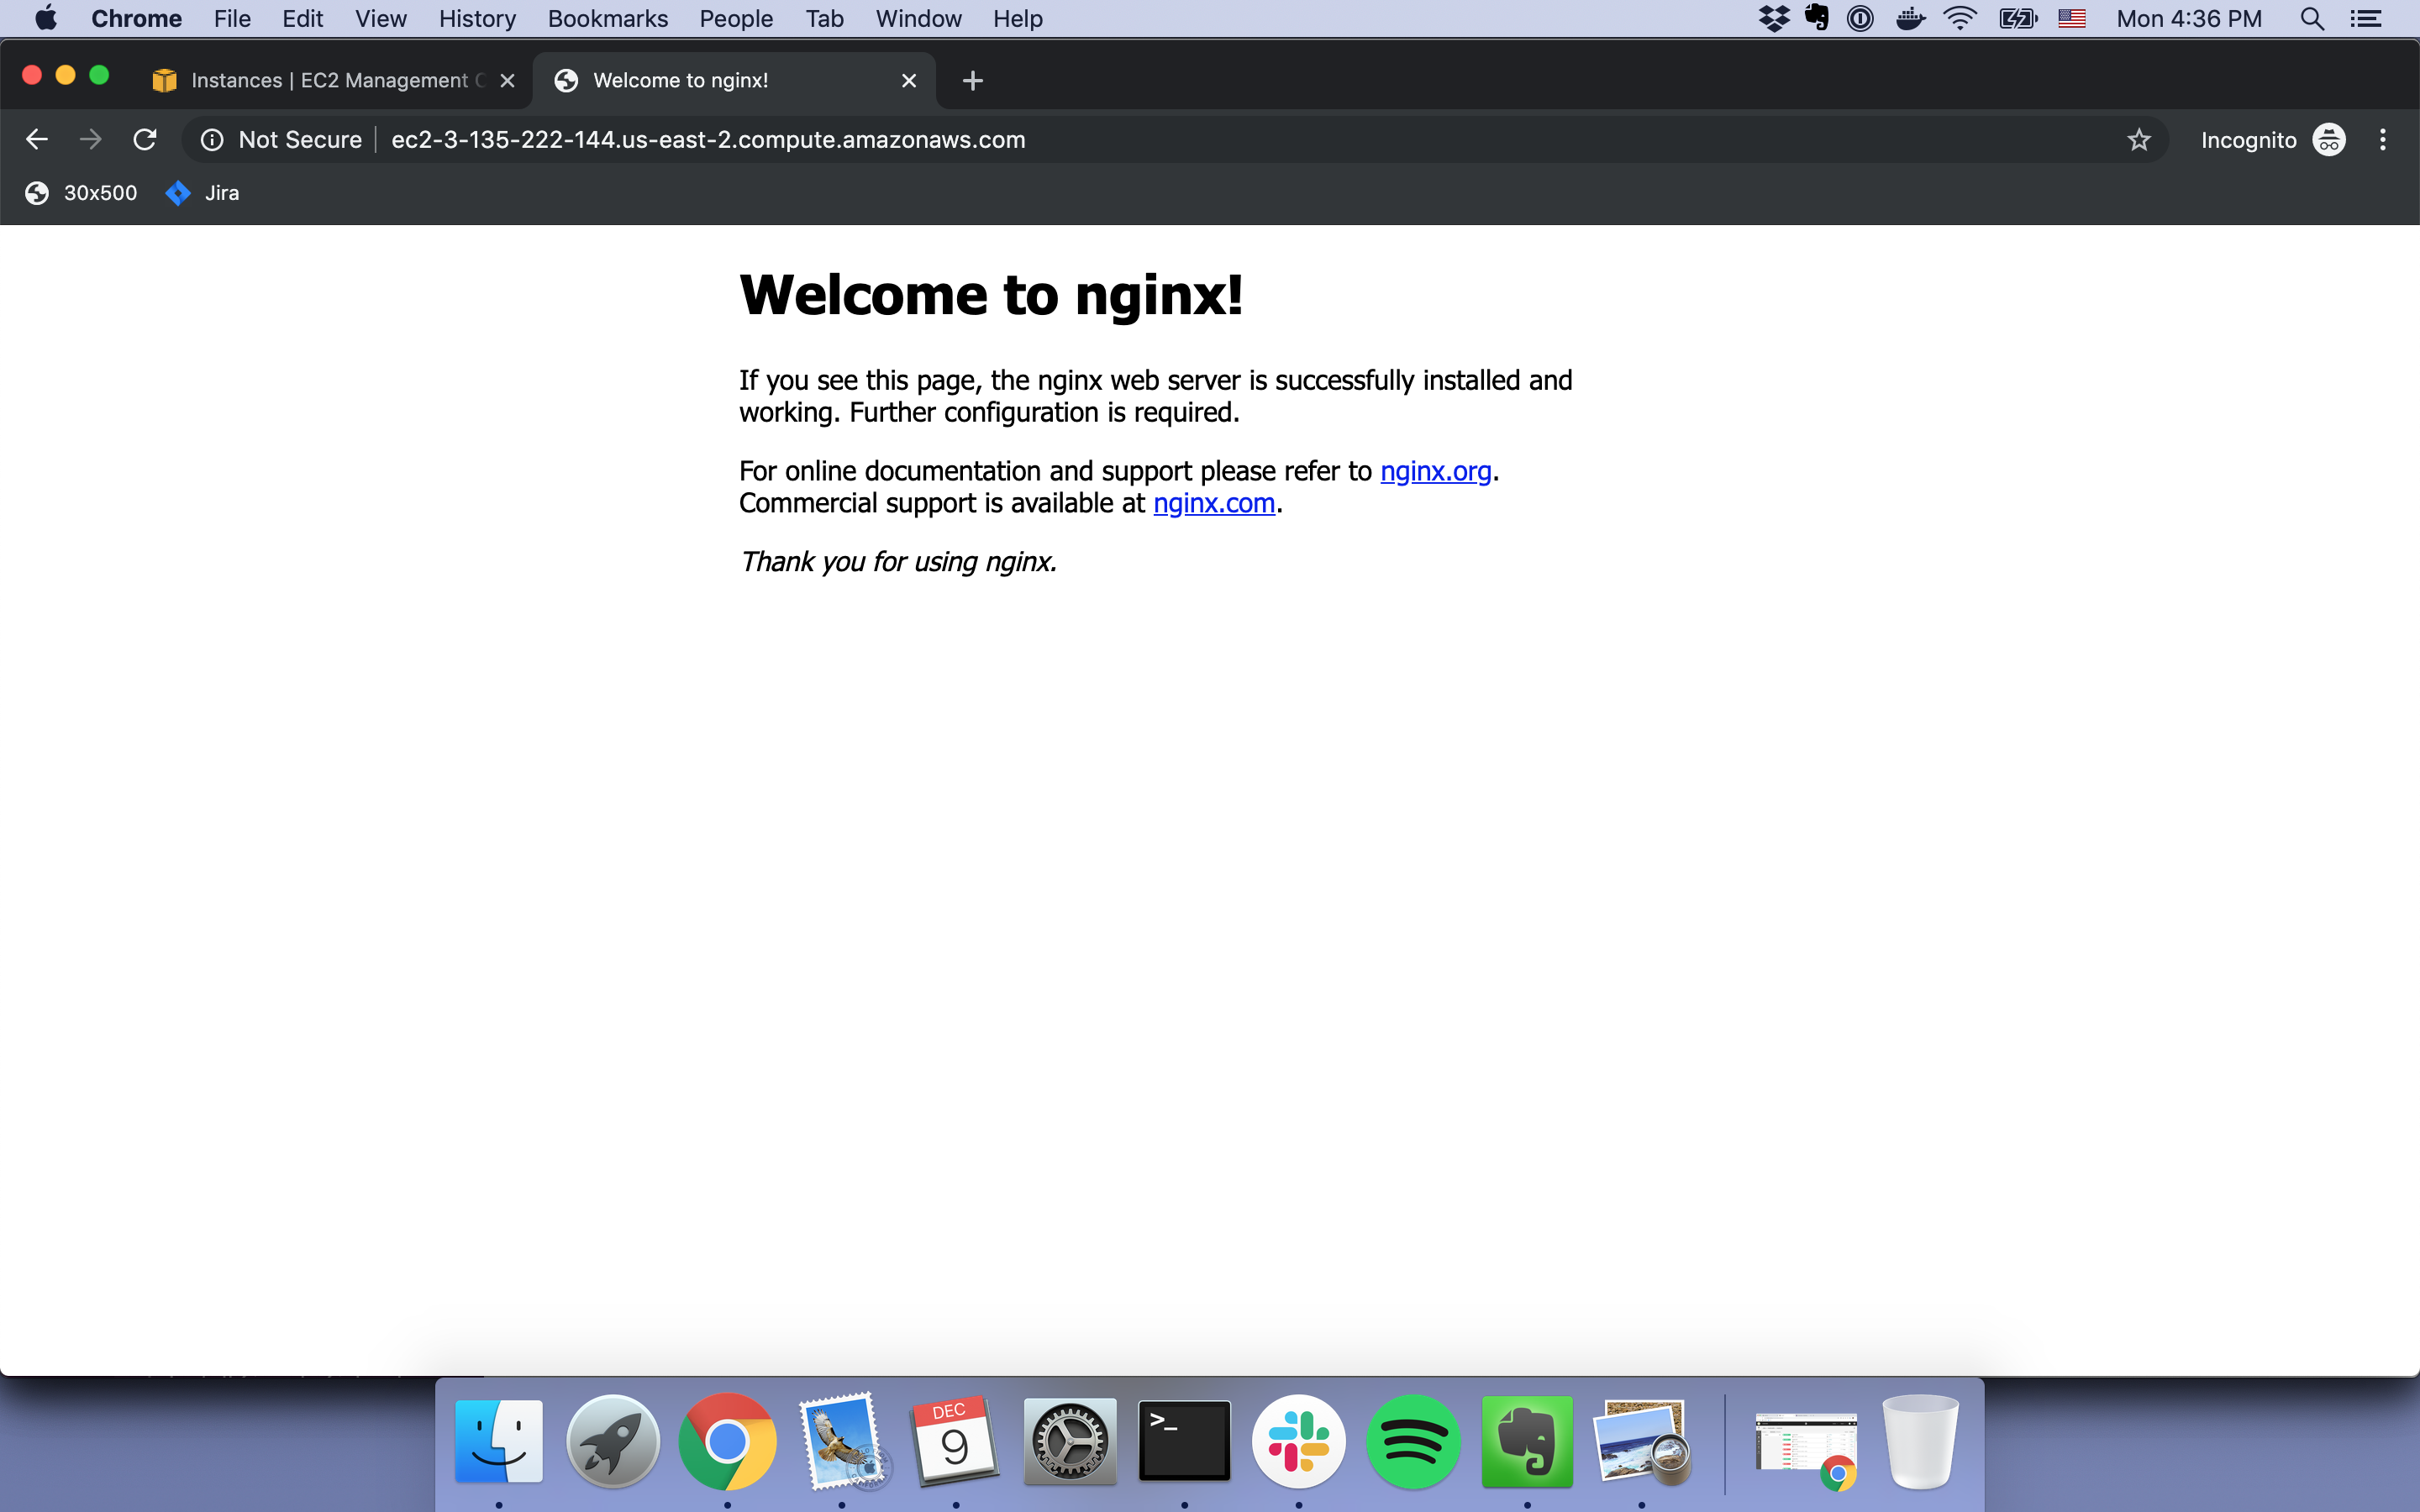
Enter your EC2 instance’s public DNS into your browser. As a reminder, this can be done by going to the EC2 Dashboard, right-clicking your instance, and clicking Connect.

When you visit your server you should see the following page. This means nginx is running!

Now we can move onto the next step, connecting Rails with nginx.

Exosuit demo video #2: launching an EC2 instance from Exosuit’s web UI

Exosuit is a tool I’ve been working on to make Rails-AWS deployments almost as easy as Rails-Heroku deployments.

Back in late September 2019, I coded up an initial version of Exosuit and released a demo video of what I had built.

Since then a lot has changed, including my conception of what Exosuit even is.

My original thought was that Exosuit would be mainly a command-line tool, with a web UI in a supporting role. Now my thinking is that Exosuit will be mainly a web UI tool, with a command-line tool in a supporting role.

Here’s what I’m currently imagining the launch process to look like, roughly:

  1. Create an Exosuit account
  2. Connect Exosuit with your AWS account and let Exosuit launch an EC2 instance
  3. Run git push exosuit master to deploy your Rails application to your new EC2 instance

So far I have steps 1 and 2 complete. It might not sound like a lot, but it took me over a month of work!

Below is a demo video of what Exosuit can do so far.

If you’d like to get real-time updates on my progress with Exosuit, you can sign up for my email list below or follow me on Twitter.