This post is the first in my series on how to deploy a Ruby on Rails application to AWS.
This post will walk you through launching an EC2 instance using the AWS console GUI. By the end of this post you’ll have an Ubuntu EC2 instance up and running.
1. Choose the instance type
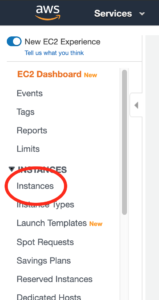
Log into your AWS console and go to the EC2 section under the Services menu.
On the left-hand menu, click Instances.
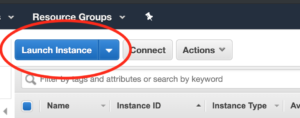
On the subsequent page, click Launch Instance.
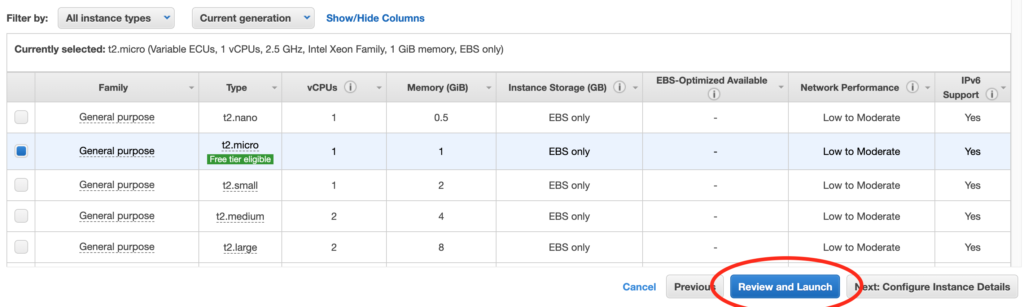
You’ll be shown a list of possible instance types. Select Ubuntu Server (ami-0d5d9d301c853a04a).

On the next screen click Review and Launch without changing anything.
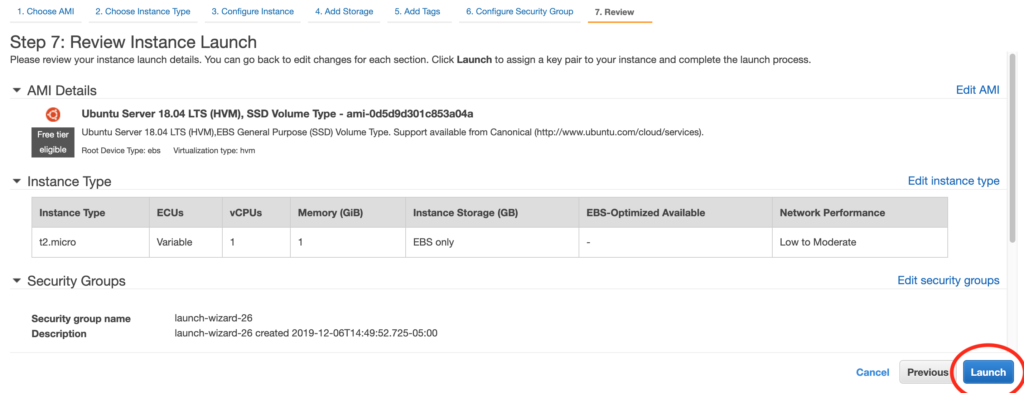
Click Launch on the screen that follows.
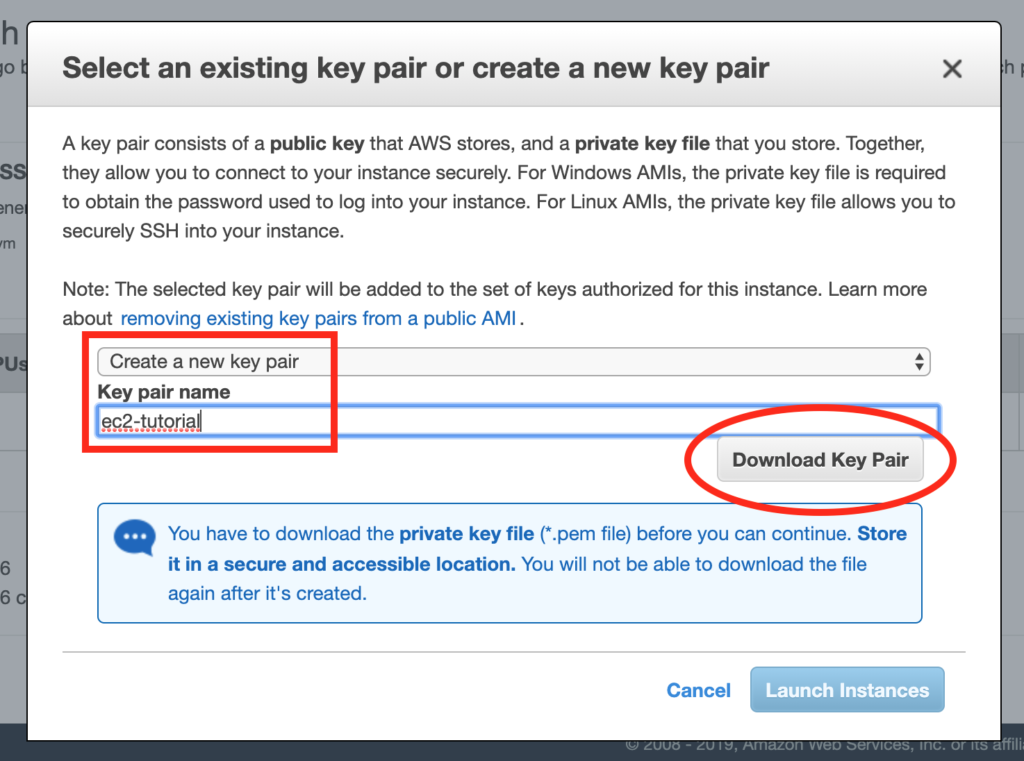
2. Create and download a key pair
After you click Launch you’ll be prompted to either create a key pair or choose an existing one. I’m not going to assume you have an existing key pair to use, so I’ll have you create a new one.
Choose “Create a new key pair”. For the name, use ec2-tutorial. Then click Download Key Pair.
If you’re wondering what a key pair is exactly, the short explanation is that a key pair is a way to ensure that only you can connect to your new EC2 instance. You’ll download your new key pair to your local machine, then anytime you SSH into your EC2 instance, you’ll specify that you want to use that key pair when you connect. If your local key pair matches what your EC2 instance has, you’ll be good to go. If not, you’ll be denied access.
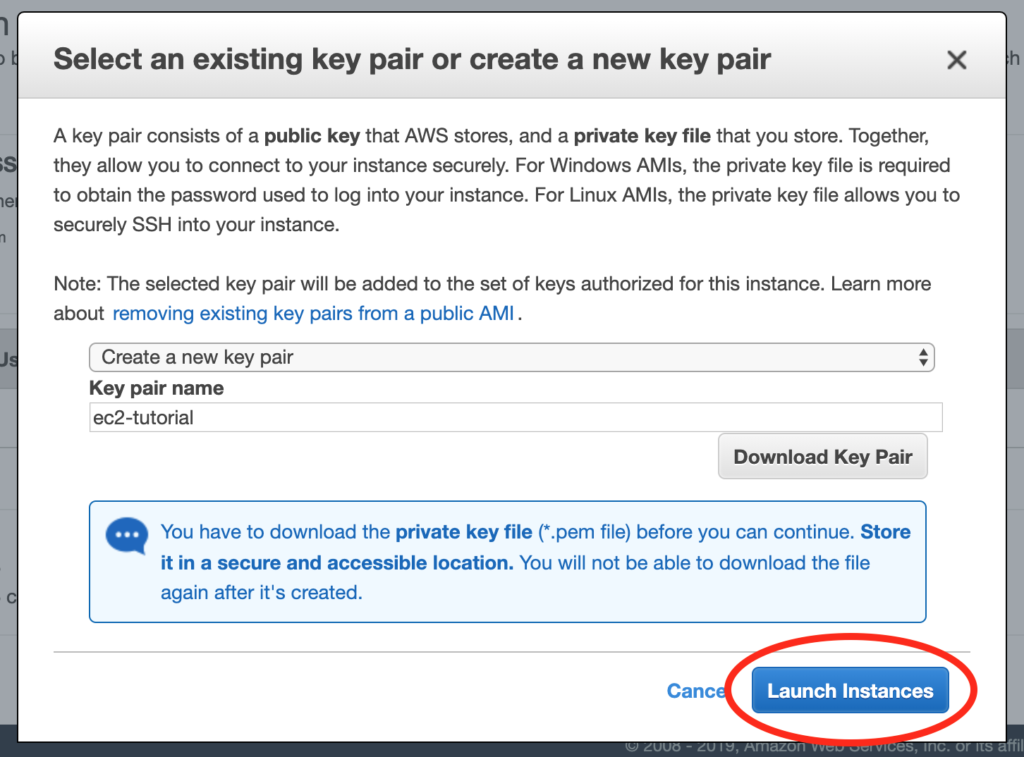
3. Launch the EC2 instance
After you’ve downloaded your key pair (make sure you download that key pair!) click Launch Instances. At this point your EC2 instance will finally actually be launched.
4. SSH into your new instance as a test
While you’re waiting for your EC2 instance to be ready, move the ec2-tutorial.pem file to ~/.ssh/ec2-tutorial.pem.
Go back to Services > EC2 > Instances. Right-click on your instance and click Connect.
In the popup that comes up, copy the ssh command that appears under “Example:”. You won’t be able to use it yet, though.
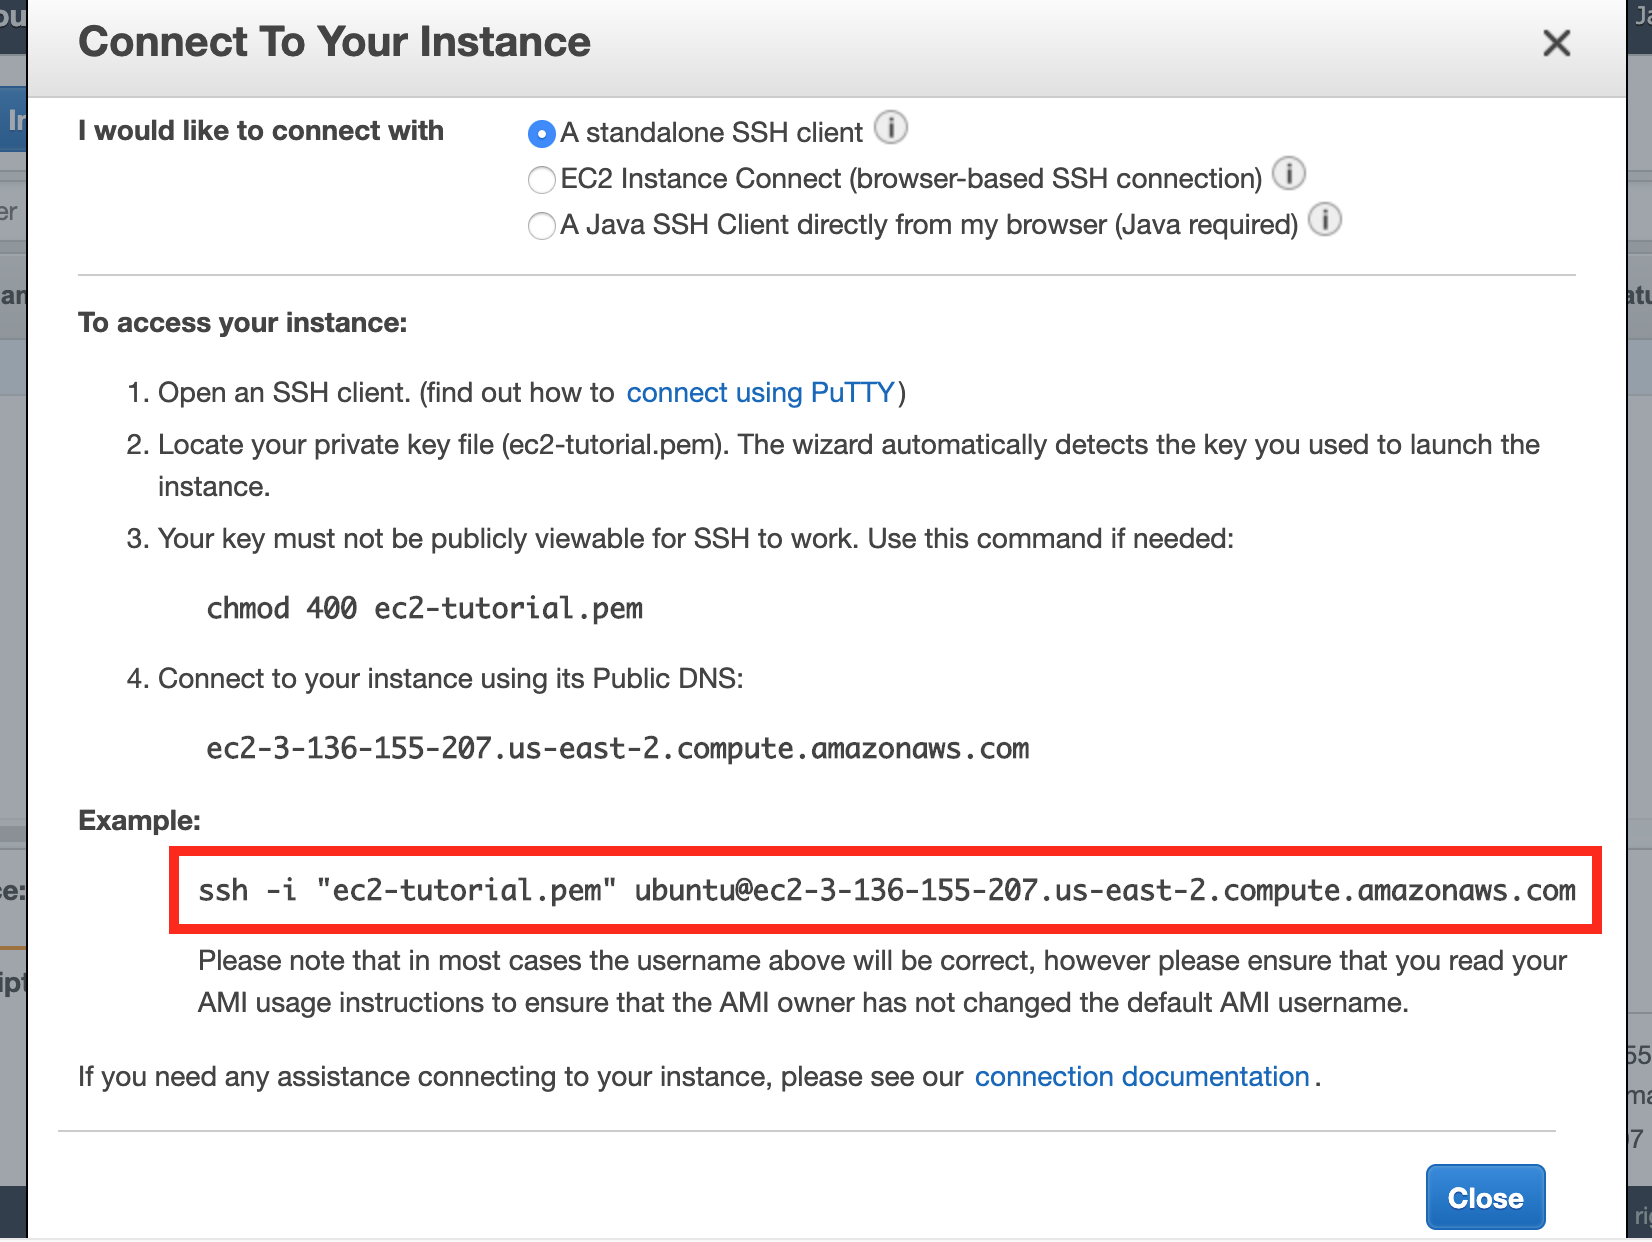
You’ll need to change the command from this
ssh -i "ec2-tutorial.pem" ubuntu@ec2-3-136-155-207.us-east-2.compute.amazonaws.com
to this
ssh -i "~/.ssh/ec2-tutorial.pem" ubuntu@ec2-3-136-155-207.us-east-2.compute.amazonaws.com
The difference is that the initial command won’t have the correct path to ec2-tutorial.pem.
You’ll also need to change the permissions on ec2-tutorial.pem. The ssh program doesn’t like it when the specified key’s permissions are overly open. Change the permissions as follows:
$ chmod 400 ~/.ssh/ec2-tutorial.pemNow you can finally run your SSH command.
$ ssh -i "~/.ssh/ec2-tutorial.pem" ubuntu@ec2-3-136-155-207.us-east-2.compute.amazonaws.comWhen asked if you’re sure you want to continue connecting, say yes.
Congratulations. You’re now the proud owner of a fresh new EC2 instance!
Now we can move onto the next step, installing nginx and Passenger.
[xyz-ihs snippet=”rails-tips-opt-in”]