Category Archives: AWS

How to launch an EC2 instance using Ansible

What this post covers

In this post I’m going to show what could be considered a “hello world” of Ansible + AWS, using Ansible to launch an EC2 instance.

Aside from the time required to set up an AWS account and install Ansible, you should be able to get your EC2 instance running in 20 minutes or less.

Why Ansible + AWS for Rails hosting?

AWS vs. Heroku

For hosting Rails applications, the service I’ve reached for the most in the past is Heroku.

Unfortunately it’s not always possible or desirable to use Heroku. Heroku can get expensive at scale. There are also sometimes legal barriers due to e.g. HIPAA.

So, for whatever reason, AWS is sometimes a more viable option than Herokou.

The challenges with AWS + Rails

Unfortunately once you leave Heroku and enter the land of AWS, you’re largely on your own in many ways. Unlike with Heroku, there’s not one single way to do your deployment. There are basically infinite possible ways.

One way is to deploy manually, but that has all the disadvantages you can imagine a manual solution would have, such as, most obviously, a bunch of manual work to do each time you deploy.

Another option is to use Elastic Beanstalk. Elastic Beanstalk is kind of like AWS’s answer to Heroku, but it’s not nearly as nice as Heroku, and customizations can be a little tricky/hacky.

The advantages of using Ansible

I’ve been using Ansible for the last several months both on a commercial project and for my own personal projects.

If you’re not familiar with Ansible, here’s a description from the docs: “Ansible is an IT automation tool. It can configure systems, deploy software, and orchestrate more advanced IT tasks such as continuous deployments or zero downtime rolling updates.”

Ansible is often seen mentioned with similar tools like Puppet and Chef. I went with Ansible because among Ansible, Puppet, and Chef, Ansible had documentation that I could actually comprehend.

I’ve personally been using Ansible for two things so far: 1) provisioning EC2 instances and 2) deploying my Rails application. When I say “provisioning” I mainly mean spinning up an EC2 instance and installing all the software on it that my Rails app needs, like PostgreSQL, Bundler, Yarn, etc.

I like using Ansible because it allows me to manage my infrastructure using (at least to an extent so far) infrastructure as code. Rather than e.g. manually installing PostgreSQL and Bundler each time I provision a new EC2 instance, I write playbooks comprised of tasks (playbook and task are Ansible terms) that say things like “install Postgresql” and “install the Bundler gem”. This makes the cognitive burden of maintenance way lower and it also makes my infrastructure setup less of a black box.

Instructions for provisioning an EC2 instance

Before you start you’ll need to have Ansible installed and of course have an AWS account available for use.

For this exercise we’re going to create two files. The first will be an Ansible playbook in a file called launch.yml which can be placed anywhere on your filesystem.

The launch playbook

Copy and paste from the content below into a file called launch.yml placed, again, wherever you want.

Make careful note of the region entry. I use us-west-2, so if you use that region also, you’ll need to make sure to look for your EC2 instance in that region and not in another one.

Also make note of the image entry. I believe EC2 images can vary from region to region, so make sure that the image ID you use does in fact exist in the region you use.

Lastly, replace my_ssh_key_name with the full path to whatever SSH key you normally use to SSH into your EC2 instances, for example, ~/.ssh/aws-key.

---
- hosts: localhost
  gather_facts: false
  vars_files:
    - vars.yml

  tasks:
    - name: Provision instance
      ec2:
        aws_access_key: "{{ aws_access_key }}"
        aws_secret_key: "{{ aws_secret_key }}"
        key_name: my_ssh_key_name
        instance_type: t2.micro
        image: ami-0d1cd67c26f5fca19
        wait: yes
        count: 1
        region: us-west-2

The vars file

Rather than hard-coding the entries for aws_access_key and aws_secret_key, which would of course be a bad idea if we were to commit our playbook to version control, we can have a separate file where we keep secret values. This separate file can either be added to a .gitignore or managed with something called Ansible Vault (which is outside the scope of this post).

Create a file called vars.yml in the same directory where you put launch.yml. This file will only need the two lines below. You’ll of course need to replace my placeholder values with your real AWS access key and secret key.

---
aws_access_key: XXXXXXXXXXXXXXXX
aws_secret_key: XXXXXXXXXXXXXXXX

The launch command

With our playbook and vars file in place, we can now run the command to execute the playbook:

$ ansible-playbook -v launch.yml

You’ll probably see a couple warnings including No config file found; using defaults and [WARNING]: No inventory was parsed, only implicit localhost is available. These are normal and can be ignored. In many use cases for Ansible, we’re running our playbooks against remote server instances, but in this case we don’t even have any server instances yet, so we’re just running our playbook right on localhost. For whatever reason Ansible feels the need to warn us about this.

Verification

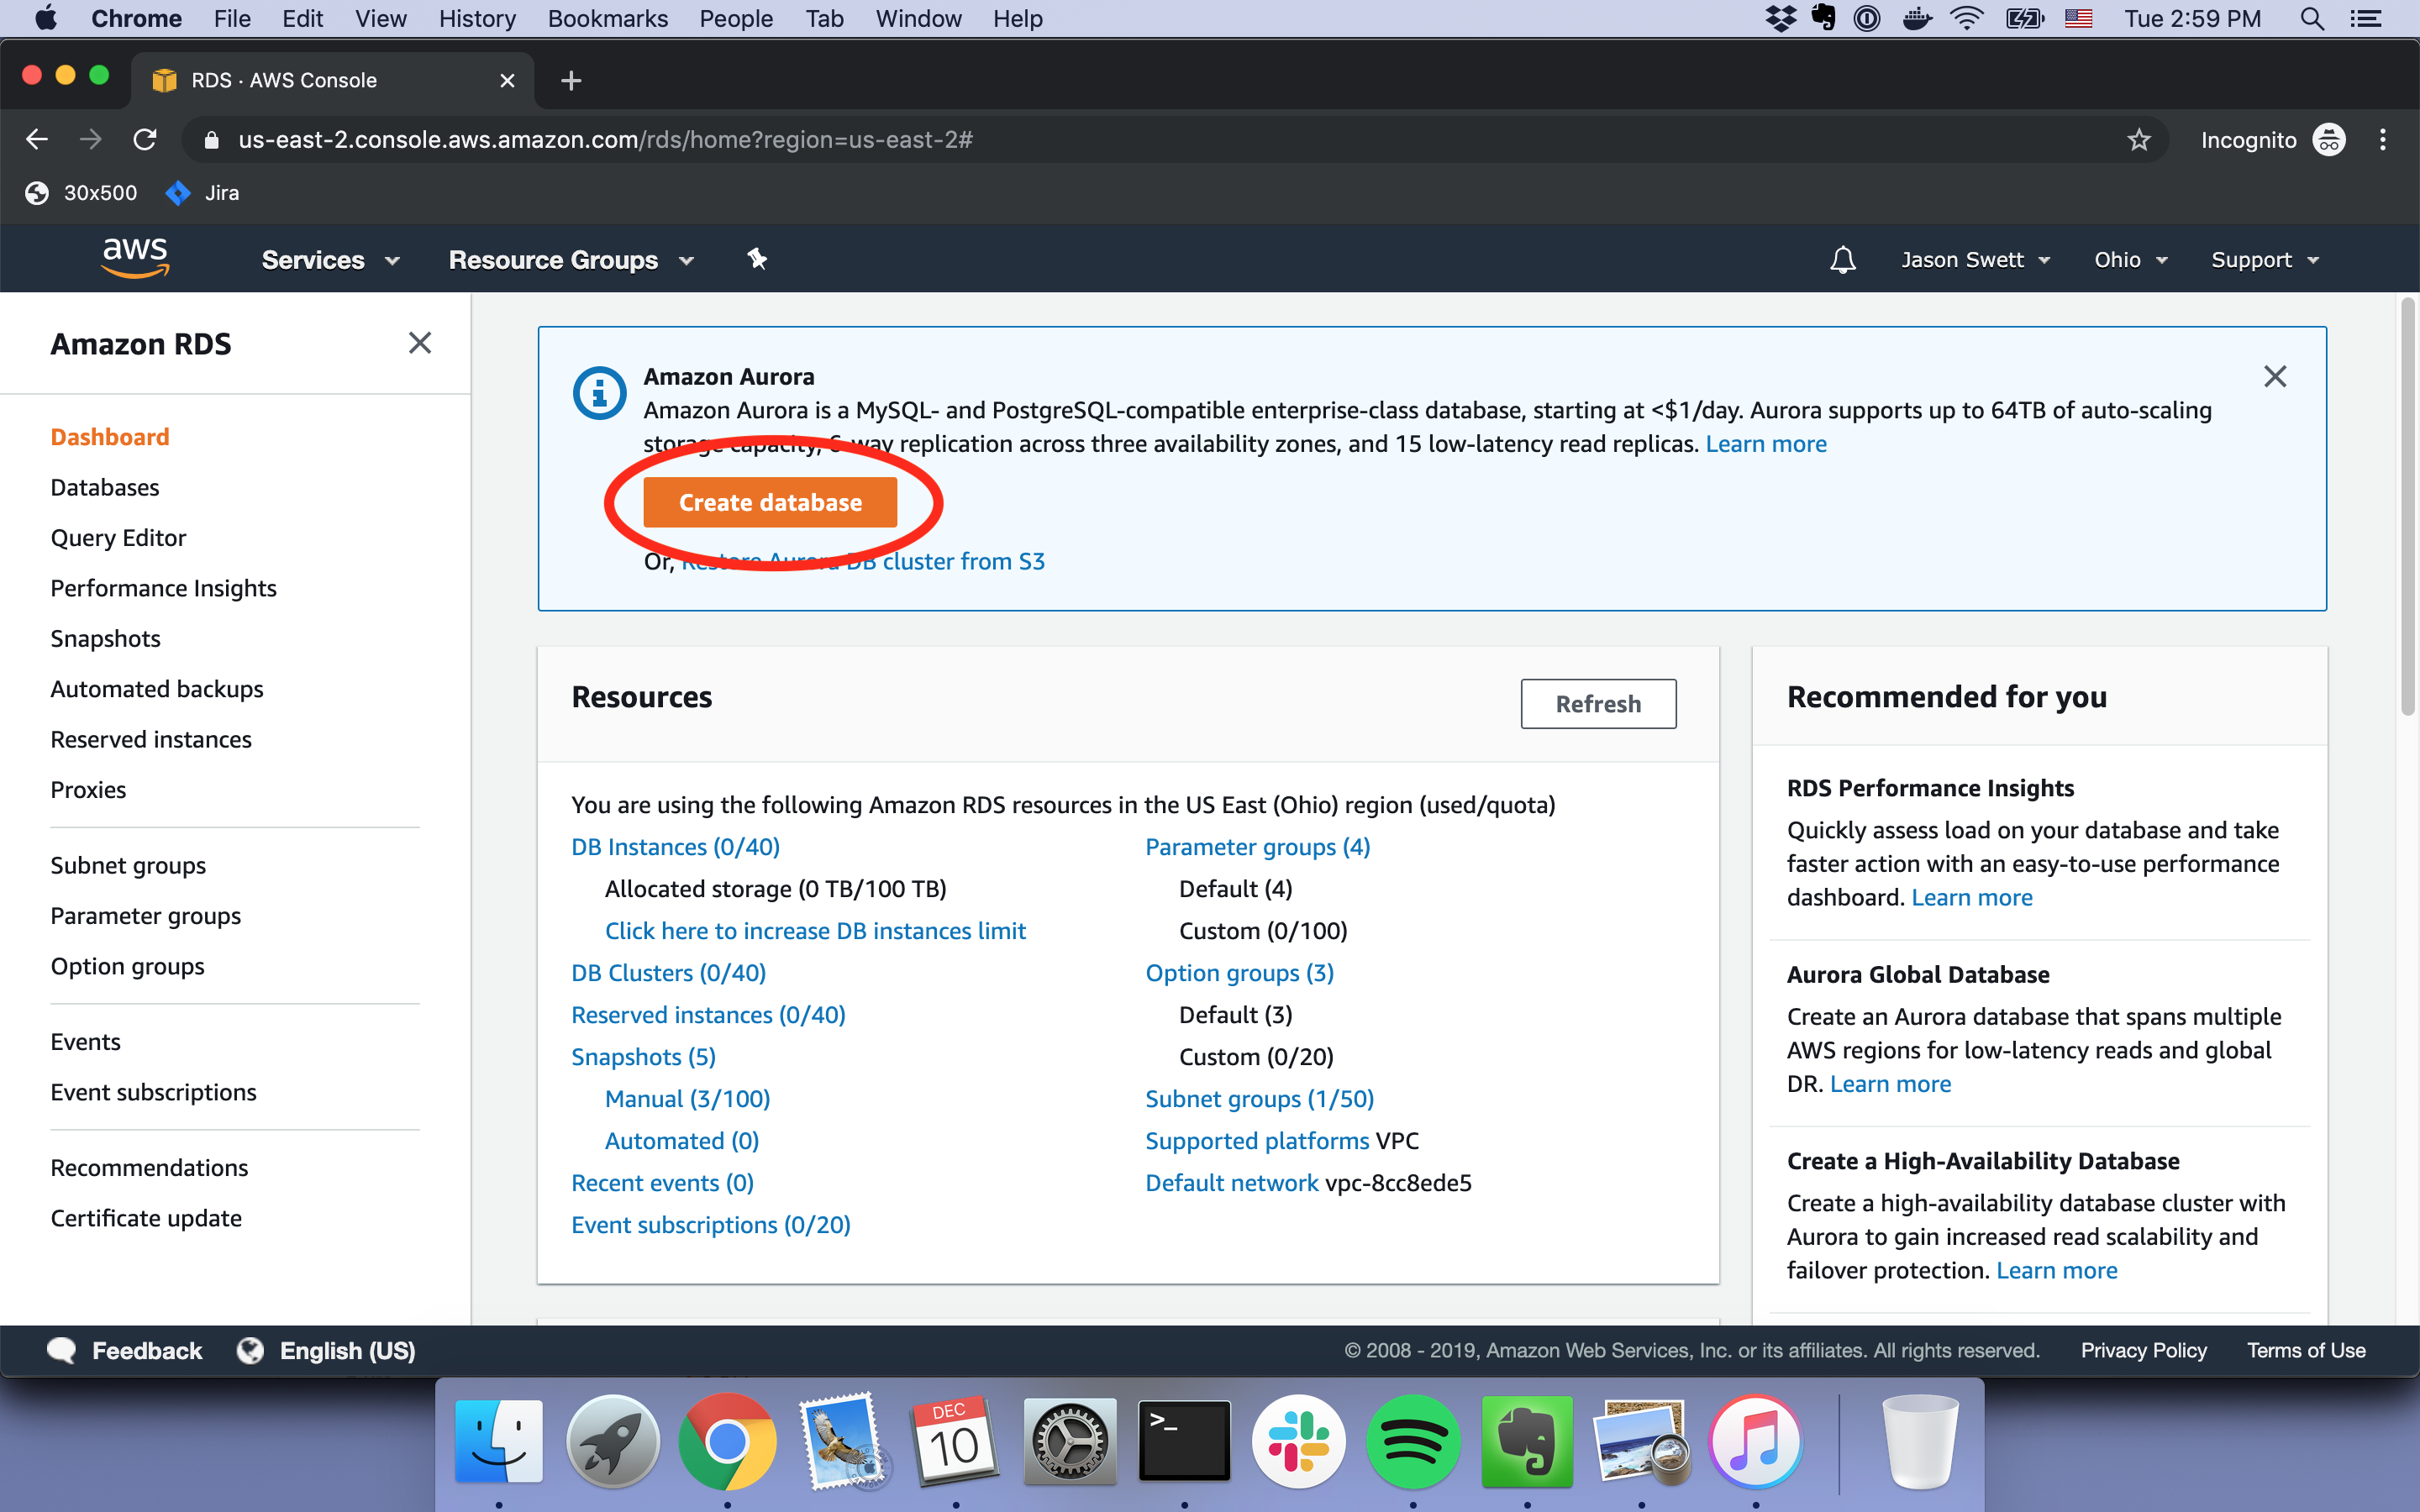
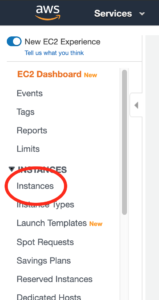
If you now open up your AWS console and go to EC2, you should now be able to see a fresh new EC2 instance.

To me this sure beats manually clicking through the EC2 instance launch wizard.

Good luck, and if you have any troubles, please let me know in the comments.

How to deploy a Ruby on Rails application to AWS Elastic Beanstalk

Overview

This tutorial will show you how to deploy a Rails application to AWS Elastic Beanstalk.

Using Elastic Beanstalk is just one of many (perhaps an infinite number of!) AWS deployment options. Each approach has different pros and cons. I’ll briefly go over some of them because it’s good to understand the pros and cons of various approaches (at least to an extent) before choosing one.

Manual EC2 deployment

One option is to do things “the old fashioned way” and manually set up a Rails application on a single EC2 instance. This is the approach I go over in this AWS/Rails deployment post and it’s perfectly fine for hobby projects where the stakes are low.

The downside to manual EC2 deployment is you end up with a snowflake server, a server with a one-of-a-kind configuration that’s hard to understand, modify, or replicate.

Elastic Beanstalk

Elastic Beanstalk is kind of analogous to Heroku. The basic idea is the same in that both Elastic Beanstalk and Heroku are abstraction layers on top of AWS services. The big difference is that Heroku is generally really easy and Elastic Beanstalk is a giant pain in the ass.

But the upside is that EB provides more easily replicable and understandable server instances than a manual EC2 instance. The server configuration is expressed in files, and then that configuration can be applied to an indefinite number of servers. This makes scaling easier. It’s also nice to know that if I somehow accidentally blow away one of my EC2 instances, EB will just automatically spin up a new identical one for me.

Another drawback to EB is that I understand EB can be kind of overly rigid. I ran into this trouble myself on a project where I needed to set up Sidekiq. I discovered that EB boxed me in in a way that made Sidekiq setup very difficult. So for a production project that grows over time, EB is perhaps a good place to start, but it should be expected that you might want to migrate to something more flexible sometime in the future.

An infrastructure-as-code approach

An infrastructure-as-code approach is probably the best long-term solution, although it currently also seems to be the most difficult and time-consuming to set up initially.

Options in this area include Ansible, Chef, Puppet, ECS, and probably a lot more. I’ve personally only used Ansible. I found Ansible to be great. This post will of course only cover Elastic Beanstalk though.

Configuration steps

Here are the steps we’ll be carrying out in this tutorial.

  1. Install the Elastic Beanstalk CLI
  2. Create the Elastic Beanstalk application
  3. Create the Elastic Beanstalk environment
  4. Create the RDS instance
  5. Deploy

Let’s get started.

Install the Elastic Beanstalk CLI

Much of what we’ll be doing involves the Elastic Beanstalk CLI (command-line interface). It can be installed with this command:

$ brew update && brew install awsebcli

Create the Elastic Beanstalk application

Now cd into the directory that contains your Rails project and run eb init.

$ eb init

When prompted, Select Create new Application. Accept the defaults for all other options.

When this command finishes running you’ll end up with a file called .elasticbeanstalk/config.yml that looks something like this:

branch-defaults:
  master:
    environment: null
    group_suffix: null
global:
  application_name: discuss_with
  branch: null
  default_ec2_keyname: aws-eb-cwj-post
  default_platform: Ruby 2.6 (Passenger Standalone)
  default_region: us-east-1
  include_git_submodules: true
  instance_profile: null
  platform_name: null
  platform_version: null
  profile: personal
  repository: null
  sc: git
  workspace_type: Application

Now that we’ve created our Elastic Beanstalk application, we’ll need to create an Elastic Beanstalk environment inside of that application. I typically set up one production environment and one staging environment inside a single application.

Create the Elastic Beanstalk environment

The command to create an environment is eb create.

$ eb create

You’ll be prompted for what to call your environment. I called mine discuss-with-production.

For load balancer type, choose application.

This step will take a long time. When it finishes, health will probably be “Severe”. Ignore this.

Set up SECRET_KEY_BASE

We’ll need to set a value for the SECRET_KEY_BASE environment variable. This can be done using the following eb setenv command which just sets the variable to a random string.

$ eb setenv SECRET_KEY_BASE=$(ruby -e "require 'securerandom';puts SecureRandom.hex(64)")

Set up ebextensions

With Elastic Beanstalk, you can add files in an .ebextensions directory at your project root to control how your server is configured. We need to add three ebextensions files.

The first, .ebextensions/01_ruby.config, looks like this:

packages:
  yum:
    git: []

container_commands:
  01_assets:
    command: RAILS_ENV=production bundle exec rake assets:precompile
    leader_only: true

The second, .ebextensions/02_yarn.config, looks like this:

commands:

  01_node_get:
    cwd: /tmp
    command: 'sudo curl --silent --location https://rpm.nodesource.com/setup_13.x | sudo bash -'

  02_node_install:
    cwd: /tmp
    command: 'sudo yum -y install nodejs'

  03_yarn_get:
    cwd: /tmp
    # don't run the command if yarn is already installed (file /usr/bin/yarn exists)
    test: '[ ! -f /usr/bin/yarn ] && echo "yarn not installed"'
    command: 'sudo wget https://dl.yarnpkg.com/rpm/yarn.repo -O /etc/yum.repos.d/yarn.repo'

  04_yarn_install:
    cwd: /tmp
    test: '[ ! -f /usr/bin/yarn ] && echo "yarn not installed"'
    command: 'sudo yum -y install yarn'

The last, .ebextensions/gem_install_bundler.config, looks like this:

files:
  "/opt/elasticbeanstalk/hooks/appdeploy/pre/09_gem_install_bundler.sh" :
    mode: "000775"
    owner: root
    group: users
    content: |
      #!/usr/bin/env bash

      EB_APP_STAGING_DIR=$(/opt/elasticbeanstalk/bin/get-config container -k app_staging_dir)
      EB_SCRIPT_DIR=$(/opt/elasticbeanstalk/bin/get-config container -k script_dir)
      # Source the application's Ruby
      . $EB_SCRIPT_DIR/use-app-ruby.sh

      cd $EB_APP_STAGING_DIR
      echo "Installing compatible bundler"
      gem install bundler -v 2.0.2

Deploy the application

Now we can make our first deployment attempt.

$ eb deploy

Unfortunately, it doesn’t work. We get an error that says: /opt/elasticbeanstalk/hooks/appdeploy/pre/12_db_migration.sh failed.

Why does this happen? Because he haven’t set up a database yet. Let’s do that now.

Create the RDS instance

In the AWS console, go to RDS, go to Databases, and click Create database.

Choose Postgresql and Free tier.

Choose whatever name you like for your database. I’m calling mine discuss-with-production

For size, choose t2.micro.

Make sure to set public accessibility to Yes so you can remotely connect to your database from your development machine.

Click Create database.

On the next screen, click View credential details.

Copy what’s there to a separate place for later use. You’ll also need the RDS instance’s endpoint URL which is found in a different place, under Connectivity & security and then Endpoint & port.

Make sure your database’s security group has port 5432 open.

Set the database credentials and create the database instance

Our production server will need to know the database endpoint URL and database credentials. Run the eb setenv command, with your own values of course replaced for mine, to set these values.

$ eb setenv RDS_DATABASE=discuss-with-production RDS_USERNAME=postgres RDS_PASSWORD=your-password RDS_HOST=your-endpoint-url

Even though the RDS instance exists, our actual PostgreSQL instance doesn’t exist yet. The RDS instance itself is more like just a container. We can run the rails db:create command remotely on the RDS instance by supplying the RDS endpoint URL when we run rails db:create.

Before running this command, make sure the production section of config/database.yml matches up with these environment variable names as follows:

production:
  <<: *default
  database: <%= ENV['RDS_DATABASE'] %>
  username: <%= ENV['RDS_USERNAME'] %>
  password: <%= ENV['RDS_PASSWORD'] %>
  host: <%= ENV['RDS_HOST'] %>
  port: 5432

Now create the database.

$ RDS_DATABASE=discuss-with-production RDS_USERNAME=postgres RDS_PASSWORD=your-password RDS_HOST=your-endpoint-url rails db:create

Deploy the application

Now the application can finally be deployed for real using eb deploy.

$ eb deploy

Once this finishes you can use the eb open command to visit your environment’s URL in the browser.

$ eb open

How to set up an RDS database for Rails on EC2

This is part 5 of my series on how to deploy a Ruby on Rails application to AWS. If you found this page via search, I recommend starting from the beginning.

Overview of this step

This is the final step. First we’ll create an RDS database in the AWS console, then we’ll create our actual Rails application database.

Just before we cross the finish line we’ll precompile our assets as the very last step.

1. Create the database

Go to the RDS page in your AWS console. Click Create database.

On the next page, choose PostgreSQL.

Scroll down and select Free tier. If you’re following along with my hello_world repo, set the database name to hello-world. For a password, put whatever you want.

Leave everything else at its default. Click Create database at the bottom.

2. Connect Rails with your RDS database

If you’re using my hello_world app, make note of what’s in config/database.yml under production. If you’re using your own app, set the production section of your app’s config/database.yml to match what’s below.

production:
  <<: *default
  database: <%= ENV['RDS_DATABASE'] %>
  username: <%= ENV['RDS_USERNAME'] %>
  password: <%= ENV['RDS_PASSWORD'] %>
  host: <%= ENV['RDS_HOST'] %>
  post: 5432

The above config code reads environment variable values. Elsewhere we need to set environment variable values.

In our nginx config file, /etc/nginx/sites-enabled/default, we need to add the following, under the server section. This will allow nginx to read our env var values.

passenger_env_var RDS_DATABASE hello-world;
passenger_env_var RDS_USERNAME postgres;
passenger_env_var RDS_PASSWORD your-password;
passenger_env_var RDS_HOST your-endpoint.rds.amazonaws.com;
passenger_env_var RAILS_ENV production;

If you don’t know where to find your endpoint URL, it can be found under Connectivity & security on the detail page for your RDS database, as pictured below.

In addition to nginx being able to read our env var values, we also need the terminal to be aware of our env var values. Unfortunately I don’t know of a way to satisfy both nginx and the terminal in a way that doesn’t involve duplication. To bring the env var values into the terminal, add the following to /home/ubuntu/.bash_profile.

export RDS_DATABASE=hello-world
export RDS_USERNAME=postgres
export RDS_PASSWORD=your-password
export RDS_HOST=your-endpoint.rds.amazonaws.com
export RAILS_ENV=production

Now execute ~/.bash_profile and echo a value to verify that the env vars have been successfully set.

. ~/.bash_profile
echo $RDS_HOST

3. Create the app’s database

Even though we’ve created the RDS database, we still need to create the actual Rails database instance. (The RDS database is more like a container.)

rails db:create

Unfortunately this won’t work. We get an error about Yarn packages. We need to address this, and in order to address this we need to install Yarn.

curl -sS https://dl.yarnpkg.com/debian/pubkey.gpg | sudo apt-key add -
echo "deb https://dl.yarnpkg.com/debian/ stable main" | sudo tee /etc/apt/sources.list.d/yarn.list
sudo apt-get update
sudo apt-get install -y yarn

Now we can install the Yarn dependencies.

yarn

And now, finally, we can actually create the database.

rails db:create
rails db:schema:load

4. Precompile assets

Before we check what’s in the browser, let’s tail the logs.

tail -f log/production.log

If the database steps were successful, we should now be past any database-related errors. The error we see should be related to assets not being precompiled.

This is easily fixed by running the rails assets:precompile command.

sudo chown -R ubuntu:ubuntu .
rails assets:precompile

5. Verify success

When you visit your EC2 instance’s URL in the browser, it should now actually work!

If you try to add a person via the form, that should actually work too!

Congratulations. You now have a working Rails application on AWS.

How to set up Rails secrets

This is part 4 of my series on how to deploy a Ruby on Rails application to AWS. If you found this page via search, I recommend starting from the beginning.

Overview of this step

We need to set up the Rails secrets security feature. It’s a relatively simple step although it does require us to jump through a few hoops.

1. Run rails credentials:edit

First we need to give permission to the current user, ubuntu, so we can make changes.

cd /var/www/hello_world
sudo chown -R ubuntu:ubuntu .

When we run the rails credentials:edit command, it will have us edit a credential file. We need to specify the editor that should be used for this action. In this case I’ll specify Vim.

export EDITOR=vim

Now we need to delete the existing config/credentials.yml.enc or else there will be a conflict.

rm config/credentials.yml.enc

With all these things out of the way, we can finally edit our credential file. No changes to the file are necessary. Just save and exit.

rails credentials:edit

Lastly, we need to give permissions back to the nginx user, www-data. Restart nginx afterward.

sudo chown -R www-data:www-data .
sudo service nginx restart

2. Verify success

Now, if you visit your EC2 instance’s URL in the browser, you should get this error:

The significant thing about this error is that it’s coming from Rails, not nginx. So we’ve made it all the way “to Rails”.

If you run tail -f log/production.log before refreshing the page, you should be able to see the exact error that’s occurring. It should be something like this:

This is telling us there’s no PostgreSQL server running, which is true. We can fix this problem in the next step: setting up our RDS database.

How to add a Rails application to an nginx server

This is part 3 of my series on how to deploy a Ruby on Rails application to AWS. If you found this page via search, I recommend starting from the beginning.

Overview of this step

In this step we’re going to clone our Rails application, make sure the server’s Ruby version matches the application’s Ruby version, and install the application’s dependencies.

1. Clone the application

For the rest of this tutorial I’m going to use a certain Rails application of mine called hello_world. Its repo is public, so feel free to use my app instead of yours for practice if you want.

cd /var/www
sudo git clone https://github.com/jasonswett/hello_world
cd hello_world

2. Install the right version of Ruby

When we set up nginx and Passenger in the previous step, we configured the server with Ruby 2.5.

Unfortunately, my hello_world application uses Ruby 2.6.5, so Ruby 2.5 isn’t going to work. We could have configured Ruby 2.6.5 from the start but I didn’t want to add more steps and make things more confusing.

We could install Ruby any way we want but I’m going to use RVM.

sudo apt-get update
sudo apt install -y gnupg2
gpg2 --keyserver hkp://pool.sks-keyservers.net --recv-keys 409B6B1796C275462A1703113804BB82D39DC0E3 7D2BAF1CF37B13E2069D6956105BD0E739499BDB
curl -L get.rvm.io | bash -s stable
source ~/.rvm/scripts/rvm
rvm install 2.6.5

3. Configure nginx to use the new Ruby version

Now we need to get the path of the Ruby we just installed.

passenger-config about ruby-command

Copy and paste the Ruby path (for me it was /home/ubuntu/.rvm/gems/ruby-2.6.5/wrappers/ruby) into /etc/nginx/sites-enabled/default.

sudo vi /etc/nginx/sites-enabled/default

Here’s what my full /etc/nginx/sites-enabled/default looks like for reference.

server {
        listen 80 default_server;
        listen [::]:80 default_server;
        
        root /var/www/hello_world/public;
        
        index index.html index.htm index.nginx-debian.html;
        
        server_name _;
        
        passenger_enabled on;
        passenger_ruby /home/ubuntu/.rvm/gems/ruby-2.6.5/wrappers/ruby;
}

4. Bundle install

Before we can serve our Rails app we need to install its dependencies using bundle install. Before we can do that we need to install Bundler.

sudo gem install bundler

Also, I’m using PostgreSQL, and in order to successfully install the pg gem, I need to have libpq-dev installed.

sudo apt-get install -y libpq-dev

Now we can bundle install.

bundle install

5. Set proper permissions

In order to do its business, the nginx user, www-data, needs to have ownership of our project directory.

sudo chown -R www-data:www-data .

6. Verify that this step worked

Lastly, we’ll verify that everything we’ve done so far has worked.

The app can’t be served yet because we haven’t yet done all the necessary steps, so we can’t verify the success of this step by checking to see if the app can be served. All we can do is check to see that the error message we get when we try to serve the app is the error message we expect.

Let’s tail the nginx log file so we can see whatever errors that come across.

sudo tail -f /var/log/nginx/error.log

Now visit your EC2 instance’s URL in the browser. What will almost certainly happen is you’ll get some sort of error. Below is the expected error.

Error: The application encountered the following error: Missing `secret_key_base` for 'production' environment

If you see the above error regarding secret_key_base, you’re all set for this step. If you get a different error, there’s a problem.

Now we can move onto the next step, setting up Rails secrets.

How to deploy a Ruby on Rails application to AWS

Overview

This tutorial will show you how to deploy a Rails application to AWS.

There are a number of ways this task could be tackled. It can be done manually or it can be done using an infrastructure-as-code approach, with a tool like Ansible.

This tutorial shows how to deploy Rails to AWS manually.

I wouldn’t recommend using a manual setup like this for a production Rails project, although I do recommend the experience of going through this manual process for the sake of learning what’s involved. It’s also find to start out hosting an application this way because it’s easy enough to migrate later to a more sophisticated hosting setup.

Before you dive in, be forewarned: it’s kind of a monster of a task. There are a large number of steps involved, many of them tricky and error-prone. Be prepared for the full process to involve hours or even days of potentially frustrating work.

Contents

The size of the setup process makes it impractical to put everything into one post, so each step is its own post.

  1. Launch EC2 instance
  2. Install nginx and Passenger
  3. Add the Rails application to the nginx server
  4. Set up secrets
  5. Create RDS database

Don’t be discouraged if not everything works on the first try. It most likely won’t. My advice if something goes wrong is to just blow everything away and start again from the beginning. I find that that approach is, paradoxically, often the fastest.

Good luck!

How to launch an EC2 instance for hosting a Rails application

This post is the first in my series on how to deploy a Ruby on Rails application to AWS.

This post will walk you through launching an EC2 instance using the AWS console GUI. By the end of this post you’ll have an Ubuntu EC2 instance up and running.

1. Choose the instance type

Log into your AWS console and go to the EC2 section under the Services menu.

On the left-hand menu, click Instances.

On the subsequent page, click Launch Instance.

You’ll be shown a list of possible instance types. Select Ubuntu Server (ami-0d5d9d301c853a04a).

On the next screen click Review and Launch without changing anything.

Click Launch on the screen that follows.

2. Create and download a key pair

After you click Launch you’ll be prompted to either create a key pair or choose an existing one. I’m not going to assume you have an existing key pair to use, so I’ll have you create a new one.

Choose “Create a new key pair”. For the name, use ec2-tutorial. Then click Download Key Pair.

If you’re wondering what a key pair is exactly, the short explanation is that a key pair is a way to ensure that only you can connect to your new EC2 instance. You’ll download your new key pair to your local machine, then anytime you SSH into your EC2 instance, you’ll specify that you want to use that key pair when you connect. If your local key pair matches what your EC2 instance has, you’ll be good to go. If not, you’ll be denied access.

3. Launch the EC2 instance

After you’ve downloaded your key pair (make sure you download that key pair!) click Launch Instances. At this point your EC2 instance will finally actually be launched.

4. SSH into your new instance as a test

While you’re waiting for your EC2 instance to be ready, move the ec2-tutorial.pem file to ~/.ssh/ec2-tutorial.pem.

Go back to Services > EC2 > Instances. Right-click on your instance and click Connect.

In the popup that comes up, copy the ssh command that appears under “Example:”. You won’t be able to use it yet, though.

You’ll need to change the command from this

ssh -i "ec2-tutorial.pem" ubuntu@ec2-3-136-155-207.us-east-2.compute.amazonaws.com

to this

ssh -i "~/.ssh/ec2-tutorial.pem" ubuntu@ec2-3-136-155-207.us-east-2.compute.amazonaws.com

The difference is that the initial command won’t have the correct path to ec2-tutorial.pem.

You’ll also need to change the permissions on ec2-tutorial.pem. The ssh program doesn’t like it when the specified key’s permissions are overly open. Change the permissions as follows:

$ chmod 400 ~/.ssh/ec2-tutorial.pem

Now you can finally run your SSH command.

$ ssh -i "~/.ssh/ec2-tutorial.pem" ubuntu@ec2-3-136-155-207.us-east-2.compute.amazonaws.com

When asked if you’re sure you want to continue connecting, say yes.

Congratulations. You’re now the proud owner of a fresh new EC2 instance!

Now we can move onto the next step, installing nginx and Passenger.

How I wrote a command-line Ruby program to manage EC2 instances for me

Why I did this

Heroku is great, but not in 100% of cases

When I want to quickly deploy a Rails application, my go-to choice is Heroku. I’m a big fan of the idea that I can just run heroku create and have a production application online in just a matter of seconds.

Unfortunately, Heroku isn’t always a desirable option. If I’m just messing around, I don’t usually want to pay for Heroku features, but I also don’t always want my dynos to fall asleep after 30 minutes like on the free tier. (I’m aware that there are ways around this but I don’t necessarily want to deal with the hassle of all that.)

Also, sometimes I want finer control than what Heroku provides. I want to be “closer to the metal” with the ability to directly manage my EC2 instances, RDS instances, and other AWS services. Sometimes I desire this for cost reasons. Sometimes I just want to learn what I think is the valuable developer skill of knowing how to manage AWS infrastructure.

Unfortunately, using AWS by itself isn’t very easy.

Setting up Rails on bare EC2 is a time-consuming and brain-consuming hassle

Getting a Rails app standing up on AWS is pretty hard and time-consuming. I’m actually not even going to get into Rails-related stuff in this post because even the small task of getting an EC2 instance up and running—without no additional software installed on that instance—is a lot harder than I think it should be, and there’s a lot to discuss and improve just inside that step.

Just to briefly illustrate what a pain in the ass it is to get an EC2 instance launched and to SSH into it, here are the steps. The steps that follow are the command-line steps. I find the AWS GUI console steps roughly equally painful.

1. Use the AWS CLI create-key-pair command to create a key pair. This step is necessary for later when I want to SSH into my instance.

2. Think of a name for the key pair and save it somewhere. Thinking of a name might seem like a trivially small hurdle, but every tiny bit of mental friction adds up. I don’t want to have to think of a name, and I don’t want to have to think about where to put the file (even if that means just remembering that I want to put the key in ~/.ssh, which is the most likely case.

3. Use the run-instances command, using an AMI ID (AMI == Amazon Machine Image) and passing in my key name. Now I have to go look up the run-instances (because I sure as hell don’t remember it) and, look up my AMI ID, and remember what my key name is. (If you don’t know what an AMI ID is, that’s what determines whether the instance will be Ubuntu, Amazon Linux, Windows, etc.)

4. Use the describe-instances command to find out the public DNS name of the instance I just launched. This means I either have to search the JSON response of describe-instances for the PublicDnsName entry or apply a filter. Just like with every AWS CLI command, I’d have to go look up the exact syntax for this.

5. Run the ssh command, passing in my instance’s DNS and the path to my key. This step is probably the easiest, although it took me a long time to commit the exact ssh -i syntax to memory. For the record, the command is ssh -i ~/.ssh/my_key.pem ubuntu@mypublicdns.com. It’s a small pain in the ass to have to look up the public DNS for my instance again and remember whether my EC2 user is going to be ubuntu or ec2-user (it depends on what AMI I used).

My goals for my AWS command-line tool

All this fuckery was a big hassle so I decided to write my own command-line tool to manage EC2 instances. I call the tool Exosuit. You can actually try it out yourself by following these instructions.

There were four specific capabilities I wanted Exosuit to have.

Launch an instance

By running bin/exo launch, it should launch an EC2 instance for me. It should assume I want Ubuntu. It should let me know when the instance is ready, and what its instance ID and public DNS are.

SSH into an instance

I should be able to run bin/exo ssh, get prompted for which instance I want to SSH into, and then get SSH’d into that instance.

List all running instances

I should be able to run bin/exo instances to see all my running instances. It should show the instance ID and public DNS for each.

Terminate instances

I should be able to run bin/exo terminate which will show me all my instance IDs and allow me to select one or more of them for termination.

How I did it

Side note: when I first wrote this, I forgot that the AWS SDK for Ruby existed, so I reinvented some wheels. Whoops. After I wrote this I refactored the project to use AWS SDK instead of shell out to AWS CLI.

For brevity I’ll focus on the bin/exo launch command.

Using the AW CLI run-instances command

The AWS CLI command for launching an instance looks like this:

aws ec2 run-instances \
  --count 1 \
  --image-id ami-05c1fa8df71875112 \
  --instance-type t2.micro \
  --key-name normal-quiet-carrot \
  --profile personal

Hopefully most of these flags are self-explanatory. You might wonder where the key name of normal-quiet-carrot came from. When the bin/exo launch command is run, Exosuit asks “Is there a file defined at .exosuit/config.yml that contains a key pair name and path? If not, create that file, create a new key pair with a random phrase for a name, and save the name and path to that file.”

Here’s what my .exosuit/config.yml looks like:

---
aws_profile_name: personal
key_pair:
  name: normal-quiet-carrot
  path: "~/.ssh/normal-quiet-carrot.pem"

The aws_profile_name is something that I imagine most users aren’t likely to need. I personally happen to have multiple AWS accounts, so it’s necessary for me to send a --profile flag when using AWS CLI commands so AWS knows which account of mine to use. If a profile isn’t specified in .exosuit/config.yml, Exosuit will just leave the --profile flag off and everything will still work fine.

Abstracting the run-instances command

Once I had coded Exosuit to construct a few different AWS CLI commands (e.g. run-instances, terminate-instances), I noticed that things were getting a little repetitive. Most troubling, I had to always remember to include the --profile flag (just as I would if I were typing all this on the command line manually), and I didn’t always remember to do so. In those cases my command would get sent to the wrong account. That’s bad.

So I created an abstraction called AWSCommand. Here’s what a usage of it looks like:

command = AWSCommand.new(
  :run_instances,
  count: 1,
  image_id: IMAGE_ID,
  instance_type: INSTANCE_TYPE,
  key_name: key_pair.name
)

JSON.parse(command.run)

You can probably see the resemblance it bears to the bare run-instances usage. Note the conspicuous absence of the profile flag, which is now automatically included every single time.

Listening for launch success

One of my least favorite things about manually launching EC2 instances is having to check periodically to see when they’ve started running. So I wanted Exosuit to tell me when my EC2 instance was running.

I achieved this by writing a loop that hits AWS once per second, checking the state of my new instance each time.

module Exosuit
  def self.launch_instance
    response = Instance.launch(self.key_pair)
    instance_id = response['Instances'][0]['InstanceId']
    print "Launching instance #{instance_id}..."

    while true
      sleep(1)
      print '.'
      instance = Instance.find(instance_id)

      if instance && instance.running?
        puts
        break
      end
    end

    puts 'Instance is now running'
    puts "Public DNS: #{instance.public_dns_name}"
  end
end

You might wonder what Instance.find and instance.running? do.

The Instance.find method will run the aws ec2 describe-instances command, parse the JSON response, then grab the relevant JSON data for whatever instance_id I passed to it. The return value is an instance of the Instance class.

When an instance of Instance is instantiated, an instance variable gets set (pardon all the “instances”) with all the JSON data for that instance that was returned by the AWS CLI. The instance.running? method simply looks at that JSON data (which has since been converted to a Ruby hash) and checks to see what the value of ['State']['Name'] is.

Here’s an abbreviated version of the Instance class for reference.

module Exosuit
  class Instance
    def initialize(info)
      @info = info
    end

    def state
      @info['State']['Name']
    end

    def running?
      state == 'running'
    end
  end
end

(By the way, all the Exosuit code is available on GitHub if you’d like to take a look.)

Success notification

As you can see from the code a couple snippets above, Exosuit lets me know once my instances has entered a running state. At this point I can run bin/exo ssh, bin/exo instances or bin/exo terminate to mess with my instance(s) as I please.

Demo video

Here’s a small sample of Exosuit in action:

Try it out yourself

If you’d like to try out Exosuit, just visit the Getting Started with Exosuit guide.

If you think this idea is cool and useful, please let me know by opening a GitHub issue for a feature you’d like to see, or tweeting at me, or simply starring the project on GitHub so I can gage interest.

I hope you enjoyed this explanation and I look forward to sharing the next steps I take with this project.

Exosuit demo video #1: launching and SSHing into an EC2 instance

Update: this video is now out of date. See demo video #2 for a more up-to-date version.

Recently I decided to begin work on a tool that makes it easier to deploy Rails apps to AWS. My wish is for something that has the ease of use of Heroku, but the fine-grained control of AWS.

My tool, which is free and open source, is called Exosuit. Below is a demo video of what Exosuit can do so far which, given the fact that Exosuit has only existed since the day before this writing, isn’t very much. Currently Exosuit can launch an EC2 instance for you and let you SSH into it.

But I think even this little bit is pretty cool – I don’t know of any other method that lets you go from zero to SSH’d into your EC2 instance in 15 seconds like Exosuit does.

If you’d like to take Exosuit for a spin on your own computer, you can! Just visit the Exosuit repo and go to the getting started guide. And if you do try it, please tweet me or send an email to jason@codewithjason.com with any thoughts or feedback you might have.