Author Archives: Jason Swett

How to add a Rails application to an nginx server

This is part 3 of my series on how to deploy a Ruby on Rails application to AWS. If you found this page via search, I recommend starting from the beginning.

Overview of this step

In this step we’re going to clone our Rails application, make sure the server’s Ruby version matches the application’s Ruby version, and install the application’s dependencies.

1. Clone the application

For the rest of this tutorial I’m going to use a certain Rails application of mine called hello_world. Its repo is public, so feel free to use my app instead of yours for practice if you want.

cd /var/www
sudo git clone https://github.com/jasonswett/hello_world
cd hello_world

2. Install the right version of Ruby

When we set up nginx and Passenger in the previous step, we configured the server with Ruby 2.5.

Unfortunately, my hello_world application uses Ruby 2.6.5, so Ruby 2.5 isn’t going to work. We could have configured Ruby 2.6.5 from the start but I didn’t want to add more steps and make things more confusing.

We could install Ruby any way we want but I’m going to use RVM.

sudo apt-get update
sudo apt install -y gnupg2
gpg2 --keyserver hkp://pool.sks-keyservers.net --recv-keys 409B6B1796C275462A1703113804BB82D39DC0E3 7D2BAF1CF37B13E2069D6956105BD0E739499BDB
curl -L get.rvm.io | bash -s stable
source ~/.rvm/scripts/rvm
rvm install 2.6.5

3. Configure nginx to use the new Ruby version

Now we need to get the path of the Ruby we just installed.

passenger-config about ruby-command

Copy and paste the Ruby path (for me it was /home/ubuntu/.rvm/gems/ruby-2.6.5/wrappers/ruby) into /etc/nginx/sites-enabled/default.

sudo vi /etc/nginx/sites-enabled/default

Here’s what my full /etc/nginx/sites-enabled/default looks like for reference.

server {
        listen 80 default_server;
        listen [::]:80 default_server;
        
        root /var/www/hello_world/public;
        
        index index.html index.htm index.nginx-debian.html;
        
        server_name _;
        
        passenger_enabled on;
        passenger_ruby /home/ubuntu/.rvm/gems/ruby-2.6.5/wrappers/ruby;
}

4. Bundle install

Before we can serve our Rails app we need to install its dependencies using bundle install. Before we can do that we need to install Bundler.

sudo gem install bundler

Also, I’m using PostgreSQL, and in order to successfully install the pg gem, I need to have libpq-dev installed.

sudo apt-get install -y libpq-dev

Now we can bundle install.

bundle install

5. Set proper permissions

In order to do its business, the nginx user, www-data, needs to have ownership of our project directory.

sudo chown -R www-data:www-data .

6. Verify that this step worked

Lastly, we’ll verify that everything we’ve done so far has worked.

The app can’t be served yet because we haven’t yet done all the necessary steps, so we can’t verify the success of this step by checking to see if the app can be served. All we can do is check to see that the error message we get when we try to serve the app is the error message we expect.

Let’s tail the nginx log file so we can see whatever errors that come across.

sudo tail -f /var/log/nginx/error.log

Now visit your EC2 instance’s URL in the browser. What will almost certainly happen is you’ll get some sort of error. Below is the expected error.

Error: The application encountered the following error: Missing `secret_key_base` for 'production' environment

If you see the above error regarding secret_key_base, you’re all set for this step. If you get a different error, there’s a problem.

Now we can move onto the next step, setting up Rails secrets.

How to install nginx and Passenger on an EC2 instance for Rails hosting

This is part 2 of my series on how to deploy a Ruby on Rails application to AWS. If you found this page via search, I recommend starting from the beginning.

Recap of last step and overview of this step

In the previous step we launched an EC2 instance.

In this step we’re going to install some useful software on our new EC2 instance, specifically web server software.

A note before diving in: I must give credit to Passenger docs, from which some of this is directly lifted.

1. Install nginx

The very first step is to install nginx, which luckily involves very few steps.

As a reminder, these commands and all commands that follow are meant to be run on your new EC2 instance. Instructions for how to SSH into your EC2 instance can be found near the end of the previous step.

sudo apt-get update
sudo apt-get install -y nginx
sudo service nginx restart

2. Install Passenger

I recommend executing each of the following groups of commands separately, one at a time. That way it’s easier to tell whether each group of commands was successful or not.

sudo apt-get install -y dirmngr gnupg
sudo apt-key adv --keyserver hkp://keyserver.ubuntu.com:80 --recv-keys 561F9B9CAC40B2F7
sudo apt-get install -y apt-transport-https ca-certificates

sudo sh -c 'echo deb https://oss-binaries.phusionpassenger.com/apt/passenger bionic main > /etc/apt/sources.list.d/passenger.list'
sudo apt-get update

sudo apt-get install -y libnginx-mod-http-passenger

The following step verifies that the config files do in fact exist at /etc/nginx/conf.d/mod-http-passenger.conf. The result of the ls command is supposed to be the file path, printed back out to you (/etc/nginx/conf.d/mod-http-passenger.conf). If it’s not, there’s a problem.

if [ ! -f /etc/nginx/modules-enabled/50-mod-http-passenger.conf ]; then sudo ln -s /usr/share/nginx/modules-available/mod-http-passenger.load /etc/nginx/modules-enabled/50-mod-http-passenger.conf ; fi
sudo ls /etc/nginx/conf.d/mod-http-passenger.conf

Now we’ll restart nginx to make our changes take effect.

sudo service nginx restart

This step validates the Passenger installation.

sudo /usr/bin/passenger-config validate-install

3. Configure nginx/Passenger to know about Ruby

What follows in this step is roughly copied from this page. If you have trouble or want clarification, I recommend visiting that page to get the info directly from its original source.

The first thing we need to do is find out our Ruby path. Running the following command will tell us. You’ll probably have to look kind of hard because the output of the command is “noisy”. The Ruby path is there but it’s kind of obscured by some other stuff.

passenger-config about ruby-command

Once you’ve found the Ruby path in the output of that command, copy it. We now need to edit /etc/nginx/sites-enabled/default. I use Vim but you can of course use whatever editor you want.

sudo vi /etc/nginx/sites-enabled/default

We’ll need to add the following two lines inside the server block. I don’t believe it matters exactly where these two lines go as long as they’re between the two braces of the server block.


passenger_enabled on;
passenger_ruby /usr/bin/ruby2.5; # Note: your Ruby path may be different

If it helps, here’s what my complete /etc/nginx/sites-enabled/default looks like (with comments removed for brevity):

server {
        listen 80 default_server;
        listen [::]:80 default_server;

        root /var/www/html;

        index index.html index.htm index.nginx-debian.html;

        server_name _;

        # Important: delete the following 3 lines
        # location / {
        #         try_files $uri $uri/ =404;
        # }

        passenger_enabled on;
        passenger_ruby /usr/bin/ruby2.5;
}

Now we’ll restart nginx to make our changes take effect.

sudo service nginx restart

4. Enable port 80 to allow web traffic

Our server is now ready to be visited in the browser, except by default AWS doesn’t have port 80 open, the port for HTTP traffic. Let’s open port 80.

The way we do this is by adding a rule for port 80 to our EC2 instance’s security group.

To do this, first go to to the AWS console, click the EC2 instance, make sure you’re on the Description tab, then click the first link under Security groups.

Then, under the Inbound tab, click Edit.

Click Add Rule, select HTTP from the list, then click Save. The change will take effect right away and HTTP traffic will be allowed starting immediately.

5. Visit the server in the browser

Enter your EC2 instance’s public DNS into your browser. As a reminder, this can be done by going to the EC2 Dashboard, right-clicking your instance, and clicking Connect.

When you visit your server you should see the following page. This means nginx is running!

Now we can move onto the next step, connecting Rails with nginx.

How to deploy a Ruby on Rails application to AWS

Overview

This tutorial will show you how to deploy a Rails application to AWS.

There are a number of ways this task could be tackled. It can be done manually or it can be done using an infrastructure-as-code approach, with a tool like Ansible.

This tutorial shows how to deploy Rails to AWS manually.

I wouldn’t recommend using a manual setup like this for a production Rails project, although I do recommend the experience of going through this manual process for the sake of learning what’s involved. It’s also find to start out hosting an application this way because it’s easy enough to migrate later to a more sophisticated hosting setup.

Before you dive in, be forewarned: it’s kind of a monster of a task. There are a large number of steps involved, many of them tricky and error-prone. Be prepared for the full process to involve hours or even days of potentially frustrating work.

Contents

The size of the setup process makes it impractical to put everything into one post, so each step is its own post.

  1. Launch EC2 instance
  2. Install nginx and Passenger
  3. Add the Rails application to the nginx server
  4. Set up secrets
  5. Create RDS database

Don’t be discouraged if not everything works on the first try. It most likely won’t. My advice if something goes wrong is to just blow everything away and start again from the beginning. I find that that approach is, paradoxically, often the fastest.

Good luck!

How to launch an EC2 instance for hosting a Rails application

This post is the first in my series on how to deploy a Ruby on Rails application to AWS.

This post will walk you through launching an EC2 instance using the AWS console GUI. By the end of this post you’ll have an Ubuntu EC2 instance up and running.

1. Choose the instance type

Log into your AWS console and go to the EC2 section under the Services menu.

On the left-hand menu, click Instances.

On the subsequent page, click Launch Instance.

You’ll be shown a list of possible instance types. Select Ubuntu Server (ami-0d5d9d301c853a04a).

On the next screen click Review and Launch without changing anything.

Click Launch on the screen that follows.

2. Create and download a key pair

After you click Launch you’ll be prompted to either create a key pair or choose an existing one. I’m not going to assume you have an existing key pair to use, so I’ll have you create a new one.

Choose “Create a new key pair”. For the name, use ec2-tutorial. Then click Download Key Pair.

If you’re wondering what a key pair is exactly, the short explanation is that a key pair is a way to ensure that only you can connect to your new EC2 instance. You’ll download your new key pair to your local machine, then anytime you SSH into your EC2 instance, you’ll specify that you want to use that key pair when you connect. If your local key pair matches what your EC2 instance has, you’ll be good to go. If not, you’ll be denied access.

3. Launch the EC2 instance

After you’ve downloaded your key pair (make sure you download that key pair!) click Launch Instances. At this point your EC2 instance will finally actually be launched.

4. SSH into your new instance as a test

While you’re waiting for your EC2 instance to be ready, move the ec2-tutorial.pem file to ~/.ssh/ec2-tutorial.pem.

Go back to Services > EC2 > Instances. Right-click on your instance and click Connect.

In the popup that comes up, copy the ssh command that appears under “Example:”. You won’t be able to use it yet, though.

You’ll need to change the command from this

ssh -i "ec2-tutorial.pem" ubuntu@ec2-3-136-155-207.us-east-2.compute.amazonaws.com

to this

ssh -i "~/.ssh/ec2-tutorial.pem" ubuntu@ec2-3-136-155-207.us-east-2.compute.amazonaws.com

The difference is that the initial command won’t have the correct path to ec2-tutorial.pem.

You’ll also need to change the permissions on ec2-tutorial.pem. The ssh program doesn’t like it when the specified key’s permissions are overly open. Change the permissions as follows:

$ chmod 400 ~/.ssh/ec2-tutorial.pem

Now you can finally run your SSH command.

$ ssh -i "~/.ssh/ec2-tutorial.pem" ubuntu@ec2-3-136-155-207.us-east-2.compute.amazonaws.com

When asked if you’re sure you want to continue connecting, say yes.

Congratulations. You’re now the proud owner of a fresh new EC2 instance!

Now we can move onto the next step, installing nginx and Passenger.

How I approach test coverage metrics

Different developers have different opinions about test coverage. Some engineering organizations not only measure test coverage but have rules around it. Other developers think test coverage is basically BS and don’t measure it at all.

I’m somewhere in between. I think test coverage is a useful metric but only in a very approximate and limited sort of way.

If I encounter two codebases, one with 10% coverage and another with 90% coverage, I can of course probably safely conclude that the latter codebase has a healthier test suite. But if there’s a difference of 90% and 100% I’m not convinced that that means much.

I personally measure test coverage on my projects, but I don’t try to optimize for it. Instead, I make testing a habit and let my habitual coding style be my guiding force instead of the test coverage metrics.

If you’re curious what type of test coverage my normal workflow naturally results in, I just checked the main project I’ve been working on for the last year or so and the coverage level is 96.62%, according to simplecov. I feel good about that number, although more important to me than the test coverage percentage is what it feels like to work with the codebase on a day-to-day basis. Are annoying regressions popping up all the time? Is new code hard to write tests for due to the surrounding code not having been written in an easily testable way? Then the codebase could probably benefit from more tests.

Exosuit demo video #2: launching an EC2 instance from Exosuit’s web UI

Exosuit is a tool I’ve been working on to make Rails-AWS deployments almost as easy as Rails-Heroku deployments.

Back in late September 2019, I coded up an initial version of Exosuit and released a demo video of what I had built.

Since then a lot has changed, including my conception of what Exosuit even is.

My original thought was that Exosuit would be mainly a command-line tool, with a web UI in a supporting role. Now my thinking is that Exosuit will be mainly a web UI tool, with a command-line tool in a supporting role.

Here’s what I’m currently imagining the launch process to look like, roughly:

  1. Create an Exosuit account
  2. Connect Exosuit with your AWS account and let Exosuit launch an EC2 instance
  3. Run git push exosuit master to deploy your Rails application to your new EC2 instance

So far I have steps 1 and 2 complete. It might not sound like a lot, but it took me over a month of work!

Below is a demo video of what Exosuit can do so far.

If you’d like to get real-time updates on my progress with Exosuit, you can sign up for my email list below or follow me on Twitter.

My general approach to Rails testing

My development workflow

The code I write is influenced by certain factors upstream of the code itself.

Before I start coding a feature, I like to do everything I can to try to ensure that the user story I’m working on is small and that it’s crisply defined. By small, I mean not more than a day’s worth of work. By crisply defined, I mean that the user story includes a reasonably precise and detailed description of what the scope of that story is.

I also like to put each user story through a reasonably thorough scrutinization process. In my experience, user stories often aren’t very thoroughly thought through and contain a level of ambiguity or inconsistency such that they’re not actually possible to implement as described.

I find that if care is taken to make sure the user stories are high-quality before development work begins, the development work goes dramatically more smoothly.

Assuming I’m starting with good user stories, I’ll grab a story to work on and then break that story into subtasks. Each day I have a to-do list for the day. On that to-do list I’ll put the subtasks for whatever story I’m currently working on. Here’s an example of what that might look like, at least as a first draft:

Feature: As a staff member, I can manage insurance payments

  • Scaffolding for insurance payments
  • Feature spec for creating insurance payment (valid inputs)
  • Feature spec for creating insurance payment (invalid inputs)
  • Feature spec for updating insurance payment

(By the way, I write more about my specific formula for writing feature specs in my post https://www.codewithjason.com/repeatable-step-step-process-writing-rails-integration-tests-capybara/.)

Where my development workflow and my testing workflow meet

Looking at the list above, you can see that my to-do list is expressed mostly in terms of tests. I do it this way because I know that if I write a test for a certain piece of functionality, then I’ll of course have to build the functionality itself as part of the process.

When I use TDD and when I don’t

Whether or not I’ll use TDD on a feature depends largely on whether it’s a whole new CRUD interface or whether it’s a more minor modification.

If I’m working on a whole CRUD interface, I’ll use scaffolding to generate the code, and then I’ll make a pass over everything and write tests. (Again, I write more about the details of this process here.) The fact that I use scaffolding for my CRUD interfaces makes TDD impossible. This is a trade-off I’m willing to make due to how much work scaffolding saves me and due to the fact that I pretty much never forget to write feature specs for my scaffold-generated code.

It’s also rare that I ever need to write any serious amount of model specs for scaffold-generated code. I usually write tests for my validators using shoulda-matchers, but that’s all. (I often end up writing more model specs later as the model grows in feature richness, but not in the very beginning.)

If instead of writing a whole new CRUD interface I’m just making a modification to existing code (or fixing a bug), that’s a case where I usually will use TDD. I find that TDD in these cases is typically easier and faster than doing test-after or skipping tests altogether. If for example I need to add a new piece of data to a CSV file my program generates, I’ll go to the relevant test file and add a failing expectation for that new piece of data. Then I’ll go and add the code to put the data in place to make the test pass.

The other case where I usually practice TDD is if the feature I’m writing is not a CRUD-type feature but rather a more of a model-based feature, where the interesting work happens “under the hood”. In those cases I also find TDD to be easier and faster than not-TDD.

The kinds of tests I write and the kind I don’t

I write more about this in my book, but I tend to mostly write model specs and feature specs. I find that most other types of tests tend to have very little value. By the way, I’m using the language of “spec” instead of “test” because I use RSpec instead of Minitest, but my high-level approach would be the exact same under any testing framework.

When I use mocks and stubs and when I don’t

I almost never use mocks or stubs in Rails projects. In 8+ years of Rails development, I’ve hardly ever done it.

How I think about test coverage

I care about test coverage enough to measure it, but I don’t care about test coverage enough to set a target for it or impose any kind of rule on myself or anything like that. I’ve found that the natural consequence of me following my normal testing workflow is that I end up with a pretty decent test coverage level. Today I checked the test coverage on the project I’ve been working on for the last year or so and the measurement was 97%.

The test coverage metric isn’t the main barometer for me though on the health level of a project’s tests. To me it seems much more useful to pay attention to how many exceptions pop up in production and what it feels like to do maintenance coding on the project. “What it feels like to do maintenance coding” is obviously not a verify quantifiable metric, but of course not everything that counts can be counted.

The difference between domains, domain models, object models and domain objects

I recently came across a question regarding the difference between domains and domain models. These terms probably mean different things to different people, but I’ll define the terms as I use them.

Domain

When I’m working on a software project, the domain is the conceptual area I’m working inside of. For example, if I’m working on an application that has to do with restaurants, the domain is restaurants.

Domain model

The world is a staggeringly complex place. Even relatively simple-seeming things like restaurants involve way more complexity than could be accurately captured in a software system. So instead of coding to a domain, we have to code to a domain model.

For me, a domain model is a separate thing from any particular code or piece of software. If I come up with a domain model for something to do with restaurants, I could express my domain model on a piece of paper if I wanted to (or just inside my head). My domain model is a standalone conceptual entity, regardless of whether I actually end up writing any software based on it or not.

A domain model also doesn’t even need to be consciously expressed in order to exist. In fact, on most software systems I’ve ever worked on, the domain model of the system only exists in the developers’ minds. The domain model isn’t something that someone planned at the beginning, it’s something that each developer synthesizes in his or her mind based on the code that exists in the application and based on what the developer understands about the domain itself.

Object model

The place where my domain model turns into actual code is in the object model. If my domain concepts include restaurant, order, and customer, then my object model will probably include objects like Restaurant, Order and Customer.

Domain object

Any object in my object model that also exist as a concept in my domain model I would call a domain object. In the previous example, Restaurant, Order and Customer would all be domain objects.

Not every object in a system is a domain object. Some objects are value objects. A value object is an object whose identity doesn’t matter. Examples of concepts that would make sense as value objects rather than domain objects are phone number values or money values.

One type of “object” that’s popular in the Rails world that I tend not to use is the service object, for reasons explained in the linked post.

Related reading: Domain Driven Design

How I wrote a command-line Ruby program to manage EC2 instances for me

Why I did this

Heroku is great, but not in 100% of cases

When I want to quickly deploy a Rails application, my go-to choice is Heroku. I’m a big fan of the idea that I can just run heroku create and have a production application online in just a matter of seconds.

Unfortunately, Heroku isn’t always a desirable option. If I’m just messing around, I don’t usually want to pay for Heroku features, but I also don’t always want my dynos to fall asleep after 30 minutes like on the free tier. (I’m aware that there are ways around this but I don’t necessarily want to deal with the hassle of all that.)

Also, sometimes I want finer control than what Heroku provides. I want to be “closer to the metal” with the ability to directly manage my EC2 instances, RDS instances, and other AWS services. Sometimes I desire this for cost reasons. Sometimes I just want to learn what I think is the valuable developer skill of knowing how to manage AWS infrastructure.

Unfortunately, using AWS by itself isn’t very easy.

Setting up Rails on bare EC2 is a time-consuming and brain-consuming hassle

Getting a Rails app standing up on AWS is pretty hard and time-consuming. I’m actually not even going to get into Rails-related stuff in this post because even the small task of getting an EC2 instance up and running—without no additional software installed on that instance—is a lot harder than I think it should be, and there’s a lot to discuss and improve just inside that step.

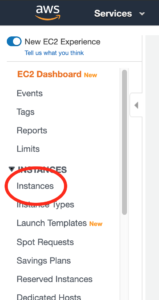
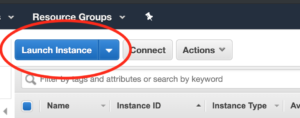
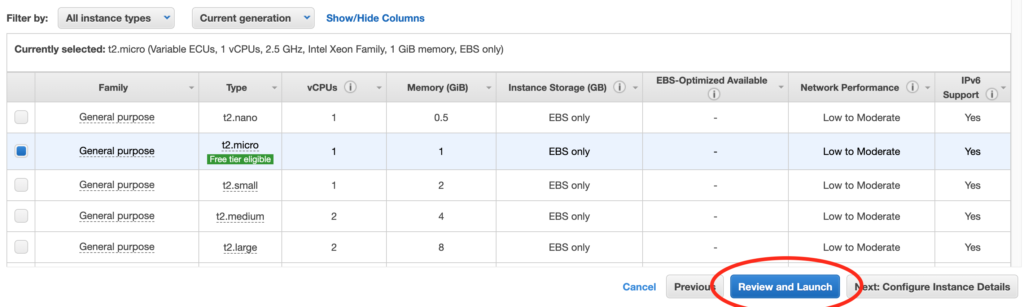
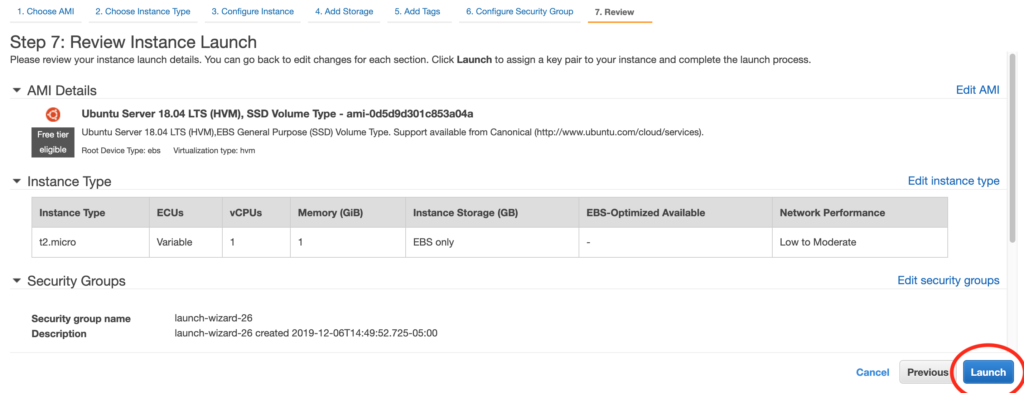
Just to briefly illustrate what a pain in the ass it is to get an EC2 instance launched and to SSH into it, here are the steps. The steps that follow are the command-line steps. I find the AWS GUI console steps roughly equally painful.

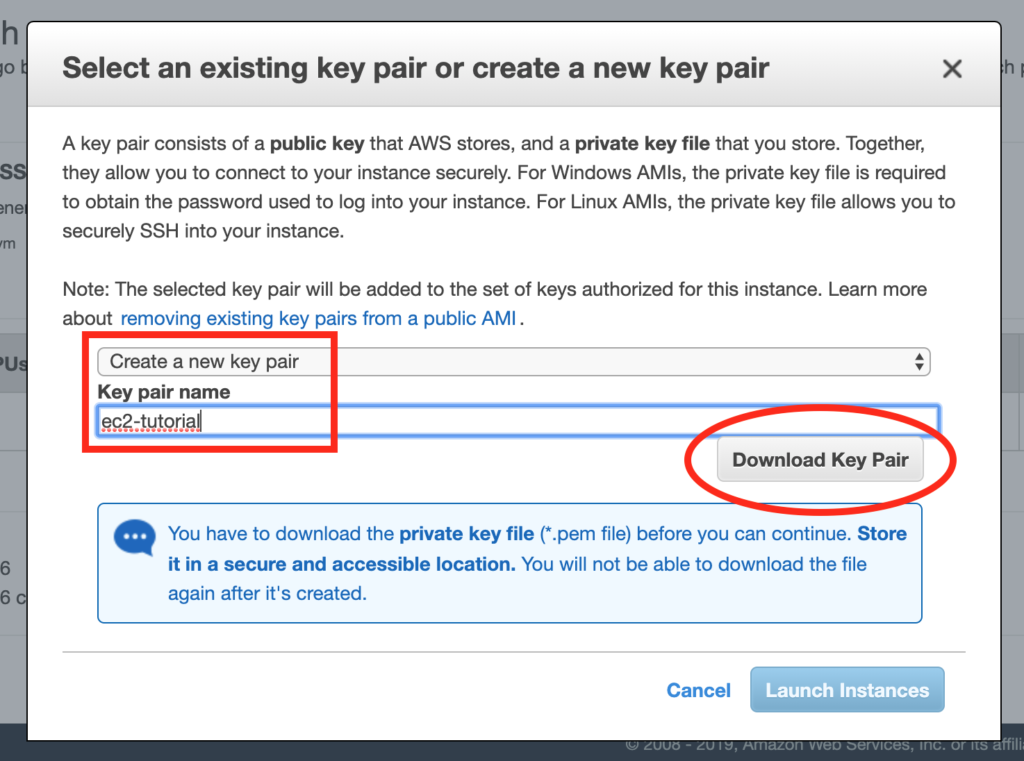
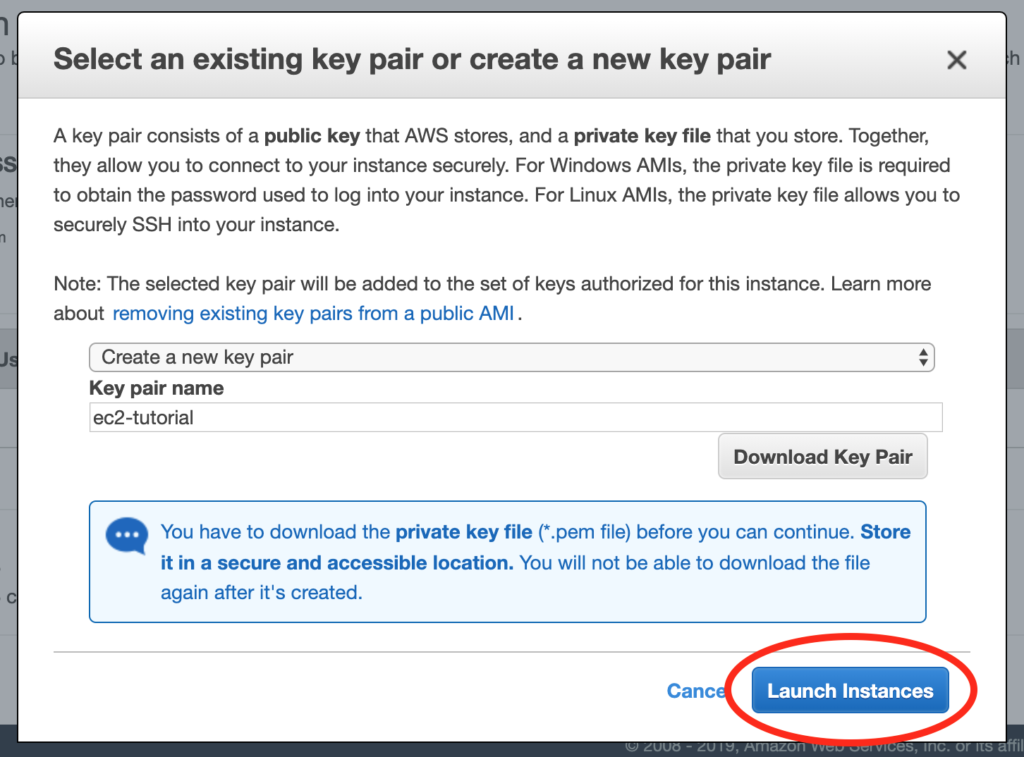
1. Use the AWS CLI create-key-pair command to create a key pair. This step is necessary for later when I want to SSH into my instance.

2. Think of a name for the key pair and save it somewhere. Thinking of a name might seem like a trivially small hurdle, but every tiny bit of mental friction adds up. I don’t want to have to think of a name, and I don’t want to have to think about where to put the file (even if that means just remembering that I want to put the key in ~/.ssh, which is the most likely case.

3. Use the run-instances command, using an AMI ID (AMI == Amazon Machine Image) and passing in my key name. Now I have to go look up the run-instances (because I sure as hell don’t remember it) and, look up my AMI ID, and remember what my key name is. (If you don’t know what an AMI ID is, that’s what determines whether the instance will be Ubuntu, Amazon Linux, Windows, etc.)

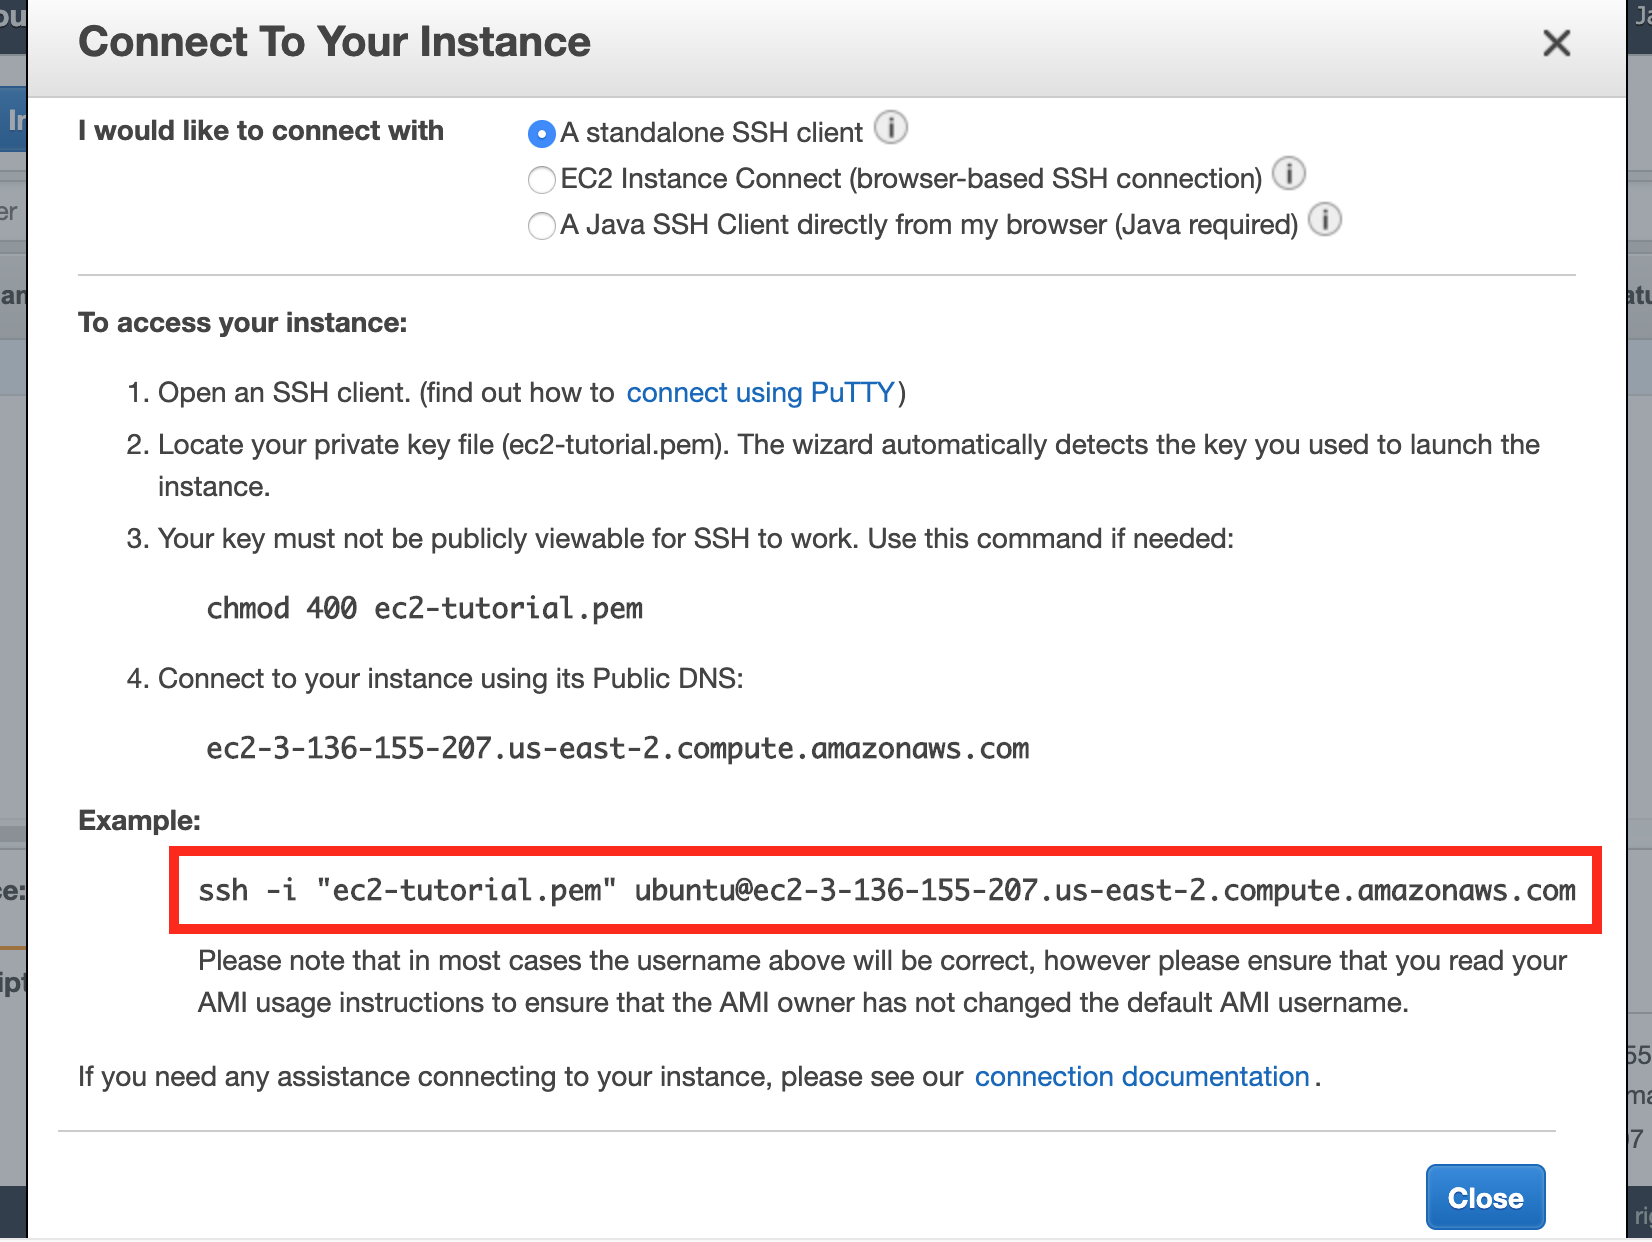
4. Use the describe-instances command to find out the public DNS name of the instance I just launched. This means I either have to search the JSON response of describe-instances for the PublicDnsName entry or apply a filter. Just like with every AWS CLI command, I’d have to go look up the exact syntax for this.

5. Run the ssh command, passing in my instance’s DNS and the path to my key. This step is probably the easiest, although it took me a long time to commit the exact ssh -i syntax to memory. For the record, the command is ssh -i ~/.ssh/my_key.pem ubuntu@mypublicdns.com. It’s a small pain in the ass to have to look up the public DNS for my instance again and remember whether my EC2 user is going to be ubuntu or ec2-user (it depends on what AMI I used).

My goals for my AWS command-line tool

All this fuckery was a big hassle so I decided to write my own command-line tool to manage EC2 instances. I call the tool Exosuit. You can actually try it out yourself by following these instructions.

There were four specific capabilities I wanted Exosuit to have.

Launch an instance

By running bin/exo launch, it should launch an EC2 instance for me. It should assume I want Ubuntu. It should let me know when the instance is ready, and what its instance ID and public DNS are.

SSH into an instance

I should be able to run bin/exo ssh, get prompted for which instance I want to SSH into, and then get SSH’d into that instance.

List all running instances

I should be able to run bin/exo instances to see all my running instances. It should show the instance ID and public DNS for each.

Terminate instances

I should be able to run bin/exo terminate which will show me all my instance IDs and allow me to select one or more of them for termination.

How I did it

Side note: when I first wrote this, I forgot that the AWS SDK for Ruby existed, so I reinvented some wheels. Whoops. After I wrote this I refactored the project to use AWS SDK instead of shell out to AWS CLI.

For brevity I’ll focus on the bin/exo launch command.

Using the AW CLI run-instances command

The AWS CLI command for launching an instance looks like this:

aws ec2 run-instances \
  --count 1 \
  --image-id ami-05c1fa8df71875112 \
  --instance-type t2.micro \
  --key-name normal-quiet-carrot \
  --profile personal

Hopefully most of these flags are self-explanatory. You might wonder where the key name of normal-quiet-carrot came from. When the bin/exo launch command is run, Exosuit asks “Is there a file defined at .exosuit/config.yml that contains a key pair name and path? If not, create that file, create a new key pair with a random phrase for a name, and save the name and path to that file.”

Here’s what my .exosuit/config.yml looks like:

---
aws_profile_name: personal
key_pair:
  name: normal-quiet-carrot
  path: "~/.ssh/normal-quiet-carrot.pem"

The aws_profile_name is something that I imagine most users aren’t likely to need. I personally happen to have multiple AWS accounts, so it’s necessary for me to send a --profile flag when using AWS CLI commands so AWS knows which account of mine to use. If a profile isn’t specified in .exosuit/config.yml, Exosuit will just leave the --profile flag off and everything will still work fine.

Abstracting the run-instances command

Once I had coded Exosuit to construct a few different AWS CLI commands (e.g. run-instances, terminate-instances), I noticed that things were getting a little repetitive. Most troubling, I had to always remember to include the --profile flag (just as I would if I were typing all this on the command line manually), and I didn’t always remember to do so. In those cases my command would get sent to the wrong account. That’s bad.

So I created an abstraction called AWSCommand. Here’s what a usage of it looks like:

command = AWSCommand.new(
  :run_instances,
  count: 1,
  image_id: IMAGE_ID,
  instance_type: INSTANCE_TYPE,
  key_name: key_pair.name
)

JSON.parse(command.run)

You can probably see the resemblance it bears to the bare run-instances usage. Note the conspicuous absence of the profile flag, which is now automatically included every single time.

Listening for launch success

One of my least favorite things about manually launching EC2 instances is having to check periodically to see when they’ve started running. So I wanted Exosuit to tell me when my EC2 instance was running.

I achieved this by writing a loop that hits AWS once per second, checking the state of my new instance each time.

module Exosuit
  def self.launch_instance
    response = Instance.launch(self.key_pair)
    instance_id = response['Instances'][0]['InstanceId']
    print "Launching instance #{instance_id}..."

    while true
      sleep(1)
      print '.'
      instance = Instance.find(instance_id)

      if instance && instance.running?
        puts
        break
      end
    end

    puts 'Instance is now running'
    puts "Public DNS: #{instance.public_dns_name}"
  end
end

You might wonder what Instance.find and instance.running? do.

The Instance.find method will run the aws ec2 describe-instances command, parse the JSON response, then grab the relevant JSON data for whatever instance_id I passed to it. The return value is an instance of the Instance class.

When an instance of Instance is instantiated, an instance variable gets set (pardon all the “instances”) with all the JSON data for that instance that was returned by the AWS CLI. The instance.running? method simply looks at that JSON data (which has since been converted to a Ruby hash) and checks to see what the value of ['State']['Name'] is.

Here’s an abbreviated version of the Instance class for reference.

module Exosuit
  class Instance
    def initialize(info)
      @info = info
    end

    def state
      @info['State']['Name']
    end

    def running?
      state == 'running'
    end
  end
end

(By the way, all the Exosuit code is available on GitHub if you’d like to take a look.)

Success notification

As you can see from the code a couple snippets above, Exosuit lets me know once my instances has entered a running state. At this point I can run bin/exo ssh, bin/exo instances or bin/exo terminate to mess with my instance(s) as I please.

Demo video

Here’s a small sample of Exosuit in action:

Try it out yourself

If you’d like to try out Exosuit, just visit the Getting Started with Exosuit guide.

If you think this idea is cool and useful, please let me know by opening a GitHub issue for a feature you’d like to see, or tweeting at me, or simply starring the project on GitHub so I can gage interest.

I hope you enjoyed this explanation and I look forward to sharing the next steps I take with this project.

Exosuit demo video #1: launching and SSHing into an EC2 instance

Update: this video is now out of date. See demo video #2 for a more up-to-date version.

Recently I decided to begin work on a tool that makes it easier to deploy Rails apps to AWS. My wish is for something that has the ease of use of Heroku, but the fine-grained control of AWS.

My tool, which is free and open source, is called Exosuit. Below is a demo video of what Exosuit can do so far which, given the fact that Exosuit has only existed since the day before this writing, isn’t very much. Currently Exosuit can launch an EC2 instance for you and let you SSH into it.

But I think even this little bit is pretty cool – I don’t know of any other method that lets you go from zero to SSH’d into your EC2 instance in 15 seconds like Exosuit does.

If you’d like to take Exosuit for a spin on your own computer, you can! Just visit the Exosuit repo and go to the getting started guide. And if you do try it, please tweet me or send an email to jason@codewithjason.com with any thoughts or feedback you might have.